

Funny thing about "weaving", a major chunk of the time and effort that goes into a weaving project is not spent actually weaving. Normally, there's a considerable amount of effort that goes into planning your project; then you must prepare the warp to go on the loom, and then you must "dress" the loom. In order to simplify things this time around, I short-circuited the planning step by choosing a project from A Handwoven Treasury (which also happens to be something I've made before).
I'm making dish towels ("Keep it Simple Towel" on pages 60-61). These towels are made of unmercerized 8/2 cotton, which is absorbent, inexpensive, available in an endless variety of colors, and easy to work with. In my opinion, it also produces beautiful cloth. Quite some time ago I purchased a 25-pound grab bag of the stuff. Not surprisingly, I got some pretty strange colors, but there were some good ones too. And actually, I suspect even the colors that look awful on the cone, like the one above - a hideous pinkish beige, will work up into an attractive end product.
For these towels I am using white for the warp (the lengthwise threads in the cloth) and plan to try out several different colors for the weft (the crosswise thread in the cloth). The process of preparing the warp is more involved than you might think. I remember the first project in my weaving class... the teacher revealed each step only as the prior step was completed, all the while reminding us to keep even tension, etc. By the time our warps were ready to go on the loom, they were like our babies. When we were instructed to cut the end off after beaming the warp (i.e. rolling it onto the back beam of the loom), my fellow students reacted with shock, "you want us to do what!?!"

Warping reel with guide string
To wind a warp you need either a warping board or a warping reel. I have a reel and am very happy with it. We used a board in class - it takes a little longer, can be hard on your shoulder and wrist, and can't accomodate a long warp like a warping reel can. I'm going to gloss over this step with just a couple of photos, but there's actually a whole (very good) book on the subject.
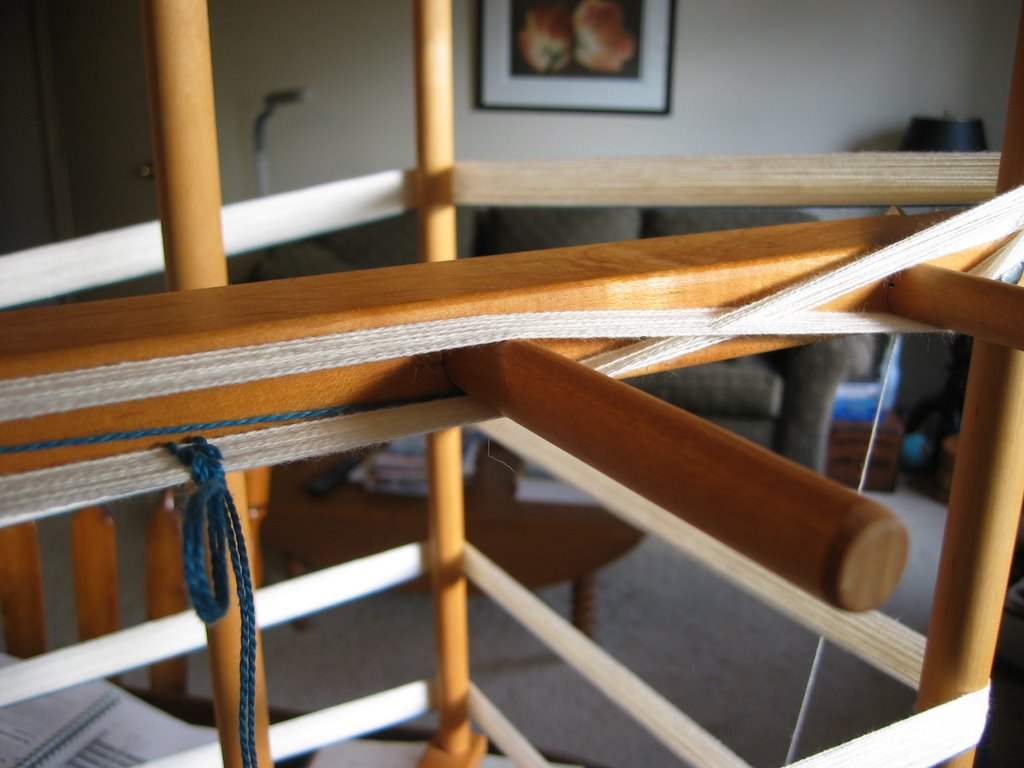
Warping reel with the cross on the right and counting thread on the left
When you wind a warp on a warping board or reel, you're not only measuring it out, you're creating "the cross" - a really simple and clever way of keeping all the threads in order through the process of dressing the loom.

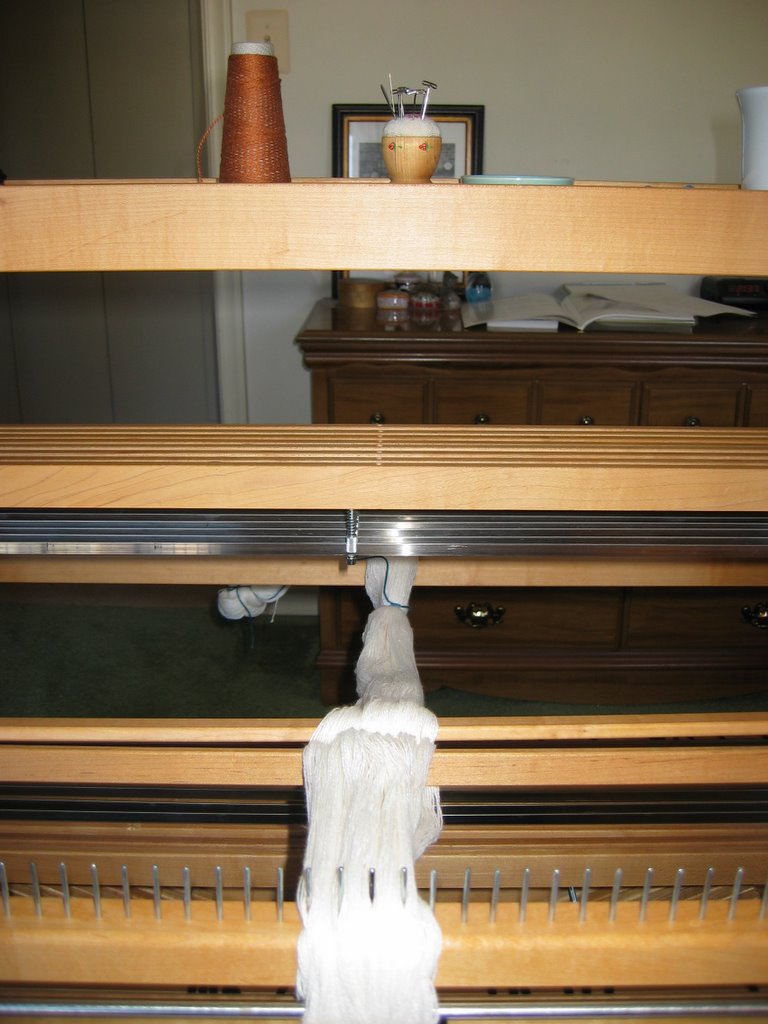
The finished warp - chained and ready for the loom
I learned to warp the loom from back to front, which means you wind the warp onto the back beam, then thread the heddles, then sley the reed, then tie the warp to the front beam. Warping from front to back is an entirely different process. From what I understand, each method is suited to particular situations, so it is probably a good idea to become familiar with both approaches. I have not yet attempted warping from front to back, but it's on my list!
When warping from back to front, you use something called a raddle to space the warp threads correctly across the back beam. So after putting the lease sticks in the cross, the first step is to distribute the threads into the raddle sections. The number of threads you put in each section depends on the size of the section (each is half an inch on my raddle) and the sett of the cloth you will be weaving (20 ends per inch, or 20 epi for this project).
The lease sticks are just behind the raddle
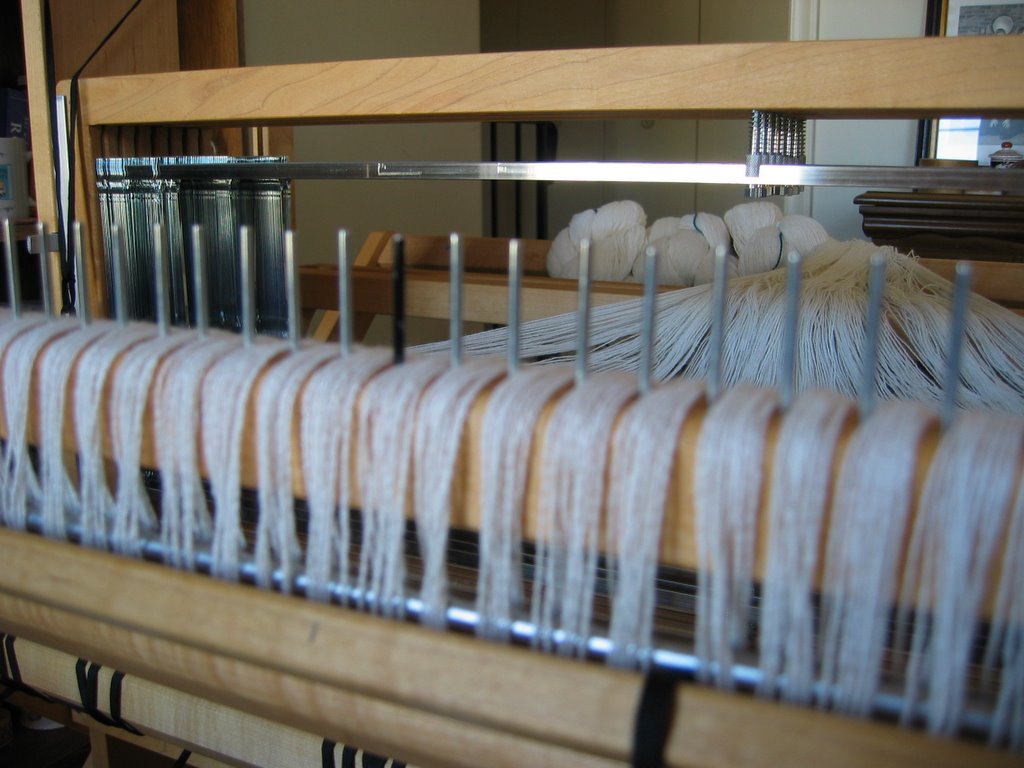
The warp threads distributed in the raddle sections
After the raddle is loaded, the warp is wound onto the back beam. Now, in my mind, is when the fun begins! I'm not entirely comfortable with the process of winding the warp and beaming the warp, so I get a little stressed during that part. But I really enjoy threading the heddles and sleying the reed...

Threading the heddles
This pattern uses four shafts (a shaft is the frame that holds the heddles and which can be raised to create a space or shed, through which the shuttle can be thrown). Each warp thread is threaded through one heddle in one of the shafts. How they're, threaded together with the treadling, determines how the fabric will look.
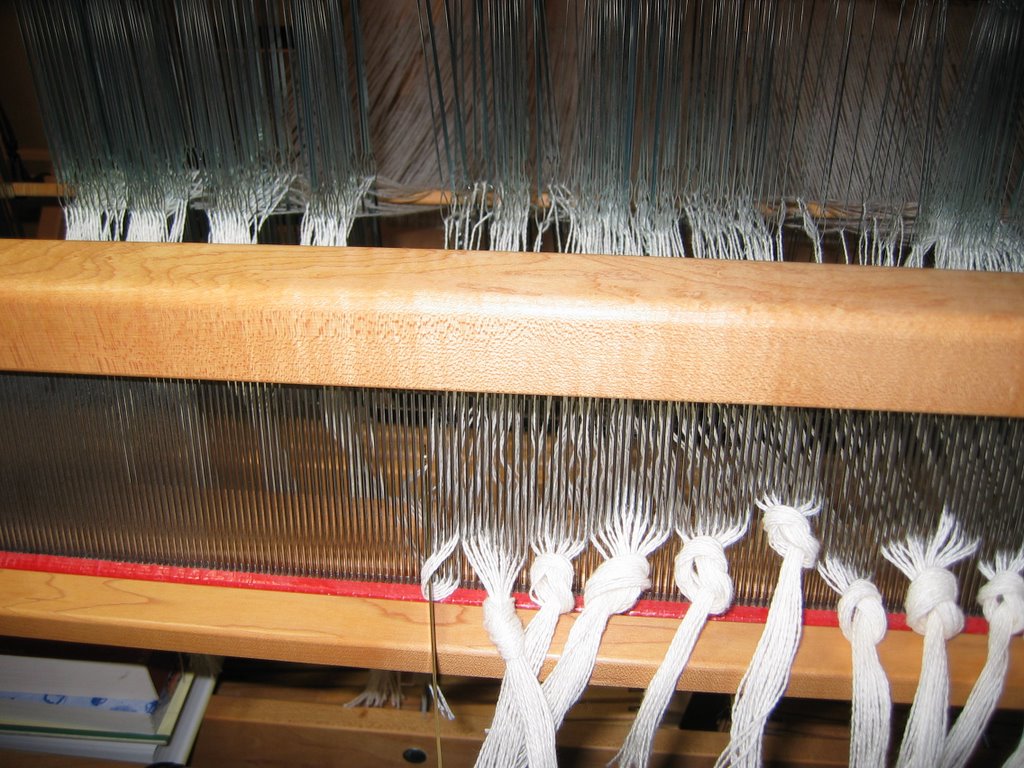
Sleying the reed
The reed keeps the warp threads spaced correctly while you are weaving. It sits in the beater and is what is used to push the weft into place after the shuttle is thrown.
Just a couple more small steps and we're ready to weave!

9 comments:
it took me a couple of passes (hey, isn't that a weaving term?) before i could absorb everything you wrote; still not sure if i truly did, but i'm completely fascinated with all the equipment and photos. looking forward to the next installment!
Wow, suddenly I feel like I don't understand English at all!! But in a good way - I think you'll just have to show me in person, Cathy!;-) It looks absolutely gorgeous that first picture...
Wow! That's a lot of work, but it will be well worth it. The towel is going to be gorgeous! I love the pattern. Is it relaxing once you get started? And, do tell, what does your cat do while all the threads are moving? Is she into everything? My cats would never allow me to weave! It's bad enough just trying to crochet. They have to be right in the middle of it. I can't wait to see the finished product. Thanks for sharing!!
That's awesome. I didn't understand a lot of it either but the photos are great.
Hi Santos - oh dear, I think I lost everyone! I sort of expected that, hence all the photos! Weaving does have an interesting vocabulary. I'm really curious about the origin of some of the terms.
Hi Zarah - sorry!! I can't wait to show you! At the rate I'm going I could still be working on this project, but I hope to speed things up a bit and if I time things right, maybe I could start on a new project while you're here.
Hi Rosa - thank you! I like this pattern too - though eventually you'll see it looks a little different off the loom. I'd say yes, weaving is relaxing once you get into a rhythm. You have to become familiar with the treadling for the fabric you're weaving and figure out the appropriate beat so that the weft is spaced correctly, but once all that has been internalized, your mind can wander to a certain extent. It's also very satisfying to see the pattern take shape in the fabric. My cat Leo (so far) seems to be afraid of the loom when it's in motion, so so-far-so-good on that count! He's not so good when I knit though!
Hi Grommie - I expect it's the kind of thing you can't really absorb unless you can see everything in motion and put your hands on it. But if I pique your interest, maybe that's enough!
Great descriptions and pictures, Cathy. Those towels are favorites of mine, too. Welcome back to weaving!
Thanks so much Charlene - it's good to be back! I've been following your blog for a little while, but just now went and looked at your archives and lo and behold there are the towels - I love your variation with the stripes!
Oh, the excitement of a new warp!!! How wonderful! (Harry, Larry and Perry just popped up in my mind when we last spoke, Cathy. Now, they just can't leave me alone, so I think I shall name my towels after them - which means I need at least three.)
Sooo beautiful... the idea and the thought behind it all...
Came here after i saw the beautiful hand woven kitchen towel you gifted your friend :)
Post a Comment