Saturday, July 31, 2004

kitchen conference


I have a new blog and it's called kitchen conference. It is about food blogging, but it is not a food blog. I'm hoping it will become a place where all of us who have an interest in food blogs - both bloggers and those not yet blogging - can ask and discuss questions pertaining to food blogging.

Please do visit and join the conversation!

Friday, July 30, 2004

Using it up


Bruschetta my way

It’s the end of the week and it’s time to clear out the leftovers and make room in the fridge for weekend shopping. My goal this evening was to use up four very sad plum tomatoes and the rest of those Lapin cherries.

I peeled and seeded the plum tomatoes and then diced them fairly fine (about ¼ inch) without really having thought about how I would use them. I originally was thinking that I would cook them in some way, but after they were cut up they looked pretty good. I started thinking salsa or bruschetta, but I didn’t have the makings for salsa.

I’m not sure how you’re supposed to make bruschetta, but I’m pretty sure it’s not like this: cheese and chile bread anyone? That’s right – that’s what I had and that’s what I used. I added a little salt, olive oil and fresh basil to the tomatoes, and toasted the bread. I remembered seeing on a cooking show that you’re supposed to rub a cut clove of garlic on the toast, so I did that. It smelled wonderful as I was rubbing it on, but I think with cheese and chile bread, garlic was beside the point. Anyway, I thought my bruschetta tasted very good – even if it was a little untraditional.

After dinner, the next order of business was to use up those cherries. I wanted to use them all and I wanted to keep it simple, so I decided on a crisp. I based my recipe for the crisp topping on Deborah Madison’s in “Vegetarian Cooking for Everyone”, but I cut it in half and swapped some almond meal for some of the flour. There’s not a lot of topping in proportion to the fruit, so you don’t get any big bites of the topping, but it’s still sweet and crisp…and you can feel just a little virtuous while you eat it.

Cherry Crisp

3 tbs canola oil
3/8 cup packed brown sugar
2 tbs flour
3 tbs almond meal
¼ cup quick oats
pinch of salt
¼ tsp nutmeg
½ tsp cinnamon
1 ½ lbs sweet cherries
1 tbs sugar
2 tbs cornstarch
dash of almond extract

Preheat oven to 375 F.

Mix the oil, brown sugar, flour, almond meal, oats, salt, nutmeg, and cinnamon together until well combined and crumbly.

Pit the cherries, cut them in half and toss together with the sugar, cornstarch, and almond extract. Put the cherry mixture in a shallow baking dish (mine was about 7x10 inches, but an 8 inch square dish would work as well) and sprinkle topping over the cherries. Bake for about 25 minutes until the topping is browned and the fruit is hot and bubbly. Serve with ice cream.


Cherry crisp

Wednesday, July 28, 2004

Best Laid Plans


One of my birthday gifts this year was Diana Kennedy’s “From My Mexican Kitchen:  Techniques and Ingredients”.  It is a beautiful book and fantastic resource loaded with photographs of ingredients, equipment, and techniques.  It doesn’t have a great number of recipes, but provides instructions for making things like tortillas, tamales, and even queso fresco (fresh cheese) from scratch.

As I browsed the book, I found that several of the recipes that appealed to me required tortilla masa.  Diana Kennedy suggests that you buy the masa at a local tortilla factory, "Or as a last resort, buy the powdered stuff and hope..."  She also provides instructions for making it from scratch.  It is made from dried corn which is boiled in lime water and then ground.  I wasn’t sure if I’d be able to find a source for the dried corn, but I decided to keep an eye out for it.  I checked several stores and finally found it in the international section of a local grocery store.

So I had my corn and I was psyched.  I went back to the book and read the recipe carefully.  It looked challenging in some ways, but doable.  As I read through I mentally checked off each step, “OK – I can do that, and I can do that…” until I got to the last paragraph, “Drain the corn, now nixtamalizado, and take it to a mill (molino), where traditionally it is ground – with no water added – between round, flat grinding stones to give it a smooth, soft texture.”  Um… where’s the mill?

Well, I’ve since done a little research on the web and, it turns out, I do have some options.  I happened on a website called GourmetSleuth which is sort of a cross between an on-line store and a search engine.  It also has some great content – lots of recipes and articles.  They sell specialized equipment and quite a few ingredients for Mexican cooking.  They also just happen to have an article on making homemade masa which discusses the ways that the corn can be ground.  If you’re making tamales you can use your food processor, but for tortillas you need a metate y mano or a molino.  Oooooh…so the mill (molino) is a gadget you clamp onto your counter rather than a place where you take your corn.

I think I’m going to get myself a molino – I’ll let you know how it works out!


Tuesday, July 27, 2004

Happenings


Food Blogger land is hopping…

IMBB7 has been announced.  Jarrett (aka redbeard) of Life in Flow and Food Porn Watch will be hosting and the theme is “You’re Just the Cutest Little Dumpling!”  The date is August 22nd.  Check out Jarrett’s post for all the details.

Lenn of LennDevours has proposed another cooperative food blogging event.  It is “World Wide Wine Blogging Wednesday” and the inaugural WWWBW is September 1st.  The idea is that you purchase a bottle of wine within specified parameters (this time it is a Merlot from a new world country priced under 15 US dollars), drink it (with food and friends, preferably), and blog about it.

And last, but certainly not least – today is Clotilde’s 25th birthday.  Happy birthday Clotilde!!


Monday, July 26, 2004

Who thinks up this stuff?


These are Honeydew Nectarines. They are brought to you by the folks at the Ito Packing Company and according to the sign at Whole Foods, they are a cross between a nectarine and a Honeydew melon. Unfortunately, I couldn’t find any more details on the Ito Packing website. I did find this really strange brochure, though.

I tasted one of the nectarines this evening. One was yellower than the other and, I assumed, riper, so that’s the one I cut into. It was awful. To be fair, I’m pretty sure the quality had nothing to do with its parentage. It was mealy and bland with only the slightest tartness near the skin – typical of peaches and nectarines purchased in the grocery store. It probably had been refrigerated before it had ripened.

I’m curious how much of a market there really is for these kinds of fruits. I’m sure there are suckers like me that buy one or two just to try, but I can’t believe people go back to buy more.

A recent article in the Honolulu Star-Bulletin talks about some of the stone fruit hybrids that are currently available. The Mango Nectarine, a cross between two different nectarines, is one of the fruits featured in the article. The Mango Nectarine is so named because of the color and flavor of the nectarine, rather than its lineage, which makes me question the accuracy of that sign in Whole Foods.

The Star-Bulletin article went on to explain how these fruits are developed. One fruit tree is hand pollinated with pollen from another fruit tree, the resulting seeds are planted, and after several years fruit are born on these new trees. The end result of one cross pollination may be hundreds of fruits – each different from the other. These fruits are “evaluated” and for each one that makes it to market, there are hundreds of others that don’t. Wonder what they tasted like?


Sunday, July 25, 2004

The Clock’s ticking…


Chocolate Cherry Quick Bread

My cherries arrived about a week and a half ago and I know they can’t last forever.  They’re still holding up pretty well, but I have almost two pounds left!  This evening I made a light and tasty quick bread using some of them.

The complementary flavors that come to mind when I think of sweet cherries are almond and chocolate.  I wanted to incorporate these flavors, but I also wanted something that would be easy to make and that would freeze well.  I decided on a chocolate quick bread with ground almonds, which I had on hand, and of course cherries.

 I found a recipe for Cocoa Quick Bread in Nick Malgieri’s How to Bake and used that as a starting point.  I upped the amount of cocoa slightly, replaced the spices with almond and vanilla extracts, and added the almonds and cherries.  I used nonfat sour cream, which resulted in a light but moist bread.  Using the regular sour cream would give you a richer bread.

I enjoyed a slice of the still warm bread this evening with a little leftover cherry chocolate chip ice cream.  Once the bread has cooled completely I plan to wrap the rest of it and stash it in the freezer.  I’ve been eating too much sweet stuff this past week with all the celebrating.  It’s time to get back to more careful eating!

Chocolate Cherry Quick Bread

1 2/3 cups all purpose flour
1/3 cup cocoa (not Dutch process)
½ tsp baking powder
½ tsp baking soda
½ tsp salt
½ cup almond meal (ground almonds)
2 large eggs
¾ cup brown sugar
½ tsp vanilla extract
½ tsp almond extract
¼ cup canola oil
¾ cup sour cream (I used nonfat)
1 1/4 cups quartered sweet cherries

Preheat oven to 375 F.  Butter and flour a 9x5x3 loaf pan.

Sift flour, cocoa, baking powder, baking soda, and salt into a large mixing bowl.  Whisk in almond meal.

Whisk eggs in another bowl and add sugar.  Whisk a minute or two until light.  Whisk in oil and sour cream.  Stir wet ingredient into dry ingredients – do not overmix.

Put batter in prepared pan and bake for 45 to 50 minutes.  Cool on rack for 5 minutes and then turn loaf out onto rack and finish cooling.


Friday, July 23, 2004

Anticipation


Guess where I’m going next April?  Actually, our dates aren’t firmed up yet, but the plan is that Bob, Chuck and I will be going to Sicily next spring.  Bob and Chuck, knowing that I love the anticipation of a trip almost as much as the trip itself, gave me this assortment of travel guides for my birthday.

I haven’t really begun to digest the books in a systematic way yet, but I have been flipping through them reading here and there.  Of course, one of the topics I’m on the lookout for is food!  I want to know which specialties I should be sure to try while I’m in Sicily and what food products I should try to bring home.

I will once again make a feeble attempt to learn Italian, and will seek out Sicilian recipes to try.  What fun lies ahead – let the anticipation begin!


Tuesday, July 20, 2004

In a Pickle


I bought too many cucumbers last week.  They were so beautiful and there was such a good deal if you bought three pounds.  So I bought three pounds and managed to lug them home, but didn’t quite get around to eating them all.
 
I started looking around on the web for refrigerator pickle recipes and found this one, which sounded very easy.  The quantities were right too.  It also provided instructions for canning the pickles, so after a little deliberation I decided I might as well can them.  I’ve canned three times this summer and I must say, I think I’m getting over my fear of canning.  Actually, “fear” is too strong a word – it’s more of a feeling that canning is difficult.  Well, it’s not.  You bring a big pot of water to a boil, stick your filled jars in there, bring the water back to a boil, and leave them in there for a few minutes.  You pull them out, they go “ping” (music to a canner’s ears!), and you’re done.  Now the only thing that holds me back is a reluctance to steam up my kitchen on a hot summer day.
 
I don’t know much about canning, but I have read enough to pick up this:  a canning recipe is probably not something you want to mess around with too much.  You have to worry about acidity and such – not because of the flavor, because of your health.  Only certain types of foods (pickles, jams, etc.) are suitable for canning in a hot water bath.  Lower acid foods need to be canned in a pressure canner.
 
Now that I think about it, picking up recipes from unknown sources on the internet (like I did), may not be well advised either.  The Food Lover’s Guide to Canning, gives this guidance regarding pickle recipes, "If you tamper with recipes at all (and we don’t advise it), use the following rule of thumb:  Every pint of pickles you prepare should include at least ¼ cup of vinegar and/or other acidifiers just as strong in acid content."

The recipe I used was particularly easy because of the small quantities.  Slicing 4 cups of cucumbers takes no time at all.  There is a 3 hour wait after you salt the pickles, so you do need to plan for about 4 hours from start to finish.
 

After salting the cucumbers and onions, there's a 3 hour wait

I just opened up one of the jars this evening and the pickles are quite good.  I think they’ll be even better once they’re chilled.  They taste much like the bread and butter pickles my Mom used to make back when she had more cucumbers than she knew what to do with…


Monday, July 19, 2004

Cherry and Chocolate Chip Ice Cream


Since my sister was making the cake for our birthday celebration last Saturday, I decided I would make some ice cream.  I got my ice cream maker a couple of months ago and I love it.  Up until now, I had been focusing on making low-fat ice cream.  Since this was a special occasion and, most importantly, I would not be eating the entire batch myself, I thought I would give real cream a try.
 
I had that five pound box of cherries sitting in my refrigerator, so there was little question what the star ingredient would be.  I based my recipe on Alton Brown’s Serious Vanilla Ice Cream and took inspiration from Ben and Jerry’s Cherry Garcia Ice Cream.
 
I tinkered with the amounts of dairy products and sugar in Alton Brown’s recipe in order to increase the quantity to somewhere around 1 ½ quarts, which is the capacity of my ice cream maker.  When I was doing the math, though, I failed to take into account the chocolate and cherries that I would be adding later.  I had to stir the cherries in after the ice cream was removed from the ice cream maker because there just wasn't room for them in the ice cream maker.  This wasn’t a huge problem, but I do think the cherries melted the ice cream a little.  Maybe I should have frozen the cherries before adding them!
 
The ice cream was really delicious and was a big hit at the party.  The flavor from the vanilla bean was incredible.  My only complaint would be that the texture of the cherries wasn’t what I had hoped for.  If you’ve ever had Ben and Jerry’s Cherry Garcia, you know that the cherries in it are soft and chewy.  The cherries in my ice cream after two hours in the freezer were a little icy and by no means chewy.  The next day they were quite icy.  Next time (and there will be a next time!) I think I’ll try cooking the cherries in a simple syrup first.
 
Cherry and Chocolate Chip Ice Cream
 
Makes over 1 ½ quarts
 
2 ½ cups half & half
1 cup whipping cream
1 ¼ cups sugar
¼ cup cherry puree (puree fresh cherries in blender)
1 vanilla bean 
2 cups quartered cherries
3 ½ - 4 oz chopped bittersweet chocolate
 
Combine half & half, cream, sugar, and cherry puree in a large saucepan.  Split the vanilla bean and scrape out the pulp.  Add both the vanilla pulp and the bean to the mixture in the saucepan.  Heat the mixture over medium heat, stirring occasionally, until the temperature reaches 170 degrees F.  If you don’t have a thermometer, bring the mixture just barely to a simmer – don’t let it boil.  Remove the pan from the heat and let it cool slightly.  Remove the vanilla bean, transfer the mixture to a covered container, and chill it in the refrigerator overnight.
 
Freeze in an ice cream maker according to manufacturer’s instructions.  Add the chocolate and cherries near the end – if necessary stir them in after the ice cream is removed from the machine.  Put the ice cream in a covered container and let it harden in the freezer for at least an hour before serving.
 
Enjoy!


Sunday, July 18, 2004

This Week at the Market


I went to the farmers market again today.  Peaches, tomatoes and cucumbers were still plentiful and a few heirloom tomato varieties showed up this week.  I bought two beautiful tomatoes:  one Purple Cherokee and one Brandywine.  I also got some yellow cherry tomatoes – not sure what kind (I don’t think they’re Sungold).
 
For the very first time, I bought cheese at the farmers market – Spring Cheese from Keswick Creamery.  It’s supposed to be a Jack-like cheese with a hint of garlic.
 
I feel like Mary Poppins when I unpack my bag.  It’s amazing how much fits in there.  Besides the tomatoes and cheese, I bought Red Garnet peaches, Swiss Chard, Kirby cucumbers, French Fillet green beans, garlic, corn, and baby sunburst squash.  No matter how carefully I pack the bag though, there are always a few casualties.  My Brandywine tomato was injured, one peach was completely smooshed, and several other peaches were bruised.  Do you think I should bring bubble wrap next time?  ;)


IMBB6 - Birthday Bash!

Saturday 9:45 pm

The house is quiet again (aaahhh) – the party is over.

This evening I hosted a family birthday party. We were celebrating the summer birthdays – mine and my two nephews’. We were also celebrating the arrival of our newest family member (my niece) who was born just last month. I really enjoy having my family over – I enjoy planning it and I enjoy seeing everyone – but I do get a little stressed getting the meal on the table. It seems no matter how prepared I think I am, when everyone starts arriving, it’s chaos.

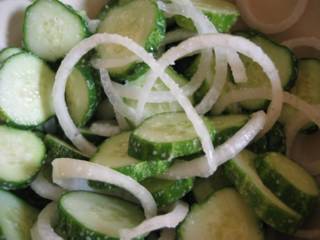
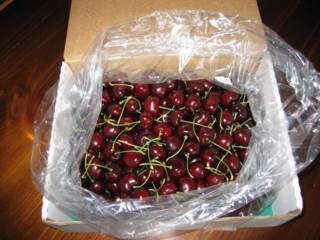
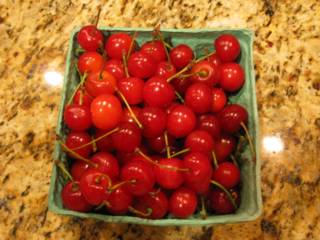
Tonight I wasn’t as prepared as I had hoped to be. Thank goodness for my Mom – she set the table, pitted and chopped the cherries for the ice cream, helped with the salad, and later even dried the dishes. Also, my sister made the cake, which was a huge help (and it was so good!). The fact that I was grilling complicated things a bit, too. To get to my backyard from the kitchen, you must squeeze through the living/dining area where all my guests were, run down the basement stairs, cross through the basement and go out the sliding glass door. With my attention divided between activities in the kitchen and the chicken grilling out back, I got lots of exercise! But grilling was a necessity because it’s time for IMBB6 and the theme is grilling. This time around IMBB is kindly being hosted by the team at Too Many Chefs.

Normally, I go the charcoal briquette/lighter fluid route when I grill, but this time I decided to use real charcoal and a chimney starter. Whole Foods carries hardwood charcoal and I easily found a chimney starter at the hardware store. Once I got the newspaper lighted, the chimney starter worked like a champ. I love the idea of not using lighter fluid and plan to stick with this method in the future.


Chimney starter

I grilled boneless chicken breasts that had been marinated for about half an hour. The recipe for the marinade is loosely based on a recipe I got from my grocery store that I use quite often. The grocery store recipe relies on dried spices, so I decided to enhance it by replacing the dried spices with fresh ingredients. I was concerned that lots of little chunks of things might burn when grilled, so I decided to puree the marinade ingredients in the blender. I did, and it created a lovely green emulsion.

Originally, I did not include the piment d’Espelette in the recipe, but when I tasted the marinade it wasn’t as hot as I had thought it would be (perhaps if I had left the seeds in the jalapeno it would have been). It probably would have been more appropriate to add a pinch of cayenne pepper as in the original recipe, but I had a little bottle of piment d’Espelette in the cupboard that I’d never used. I bought it because I’d seen it in so many of Clotilde’s recipes and I was really curious about it. I tasted the piment d’Espelette and it was quite hot, so I put just ¼ teaspoon in the marinade. I thought the little red flecks floating in the green marinade were very attractive, though I’m not sure they really showed once the chicken was cooked.

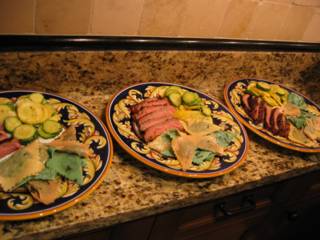
I thought the chicken tasted great. The flavor of the marinade came through but most noticeable was the grilled flavor. I really must grill out more often!


Birthday Chicken

Serves 10

1/3 cup coarsely chopped cilantro
1 jalapeno pepper, coarsely chopped
3 cloves garlic, coarsely chopped
1 tsp kosher salt
1 tsp ground cumin
¼ tsp piment d’Espelette
1 cup extra virgin olive oil
¾ cup lime juice
4 ½ pounds boneless, skinless chicken breasts

Put the cilantro, jalapeno pepper, garlic, salt, and cumin in a blender and pulse a few times. Pour in about half of the olive oil and blend well. Add the remaining olive oil and the lime juice and pulse a few times to combine.

Divide the chicken between two zip-loc type plastic storage bags and pour half the marinade in each bag. Squeeze out the air and push the chicken around so that all sides are coated with the marinade. Flatten out the bags and put in the refrigerator for about half an hour.

Grill the chicken – time will vary depending on the size of the chicken breasts.


Friday, July 16, 2004

Growing to Like Rhubarb


Rhubarb conserve
 
When I was little, we had a rhubarb plant in our yard and my Mom would frequently prepare some sort of rhubarb sauce or compote.  It was the only dessert I didn’t like and it seemed unfair to me at the time that rhubarb even counted as a dessert.
 
We moved from that house before I turned 7 and there have been very few occasions since then when I have eaten rhubarb.  Until just this past weekend, I had never prepared rhubarb myself in any form.  When I saw rhubarb at the farmers market, I decided it was time for us to get reacquainted.
 
I think there were probably two reasons I didn’t like rhubarb as a kid.  The first might have been the fact that it was so sour.  The second was probably the texture.  These days, the sourness would not be a problem for me, but the texture still might be.  I decided to stay away from compote recipes.
 
I found many tempting recipes for baked goods with rhubarb, but ended up making Rhubarb Conserve from Marcia Adams’ Cooking from Quilt Country.  It has rhubarb, orange, lemon, raisins, pecans, a little ground cloves, and lots and lots of sugar in it.
 
There was quite a bit of chopping, but once the mixture was on the stove cooking, it required only an occasional stir.  The conserve can be frozen, but I had some cute 8-ounce canning jars so I decided to can most of it.  There was about a half a cup that didn't fit in the jars, so I put that in the fridge.
 

There was lots of chopping to do...
 

...but once cooking, the conserve required only an occasional stir
 
I haven't quite figured out how to use the conserve yet - I'm thinking it might be good warmed up and used as an ice cream topping.  In the meantime, I've been snitching a little spoonful almost every evening.  It's tangy, sweet and spicy and I really, really like it!

Thursday, July 15, 2004

A Bowlful of Summer


As of yesterday, I still had two ears of corn in the refrigerator from last Sunday’s farmers market.  I know, I know... corn should be cooked immediately, lest the sugar start turning to starch.  Seems that corn is so sweet these days, though, that a couple days in the fridge makes little difference – at least not that I can tell.
 
Anyway, it was on my mind that I should use the corn soon.  I thought about roasting it – which I’ve never done before – but really didn’t feel like firing up the grill.  When I got home last night I happened to notice an article on corn in last week’s food section.  It suggested that the best way to roast corn is in the oven.  You cut the kernels off the cob, mix the corn with just a little bit of olive oil, spread it on a baking sheet, sprinkle with salt and pepper, and roast in a 475° F preheated oven for 5 to 7 minutes, until the corn is slightly browned.  That sounded easy enough, so I gave it a try.
 
While the corn was cooking, I chopped up a tomato into ½” dice, thinly sliced a few leaves of basil from my garden, and then combined the tomato and basil with a little olive oil, salt and pepper.  When the corn was done, I stirred it in and that was it!
 
The salad was delicious – not because of anything I did, but because the ingredients were so good to start with.  When you’ve got a great tasting tomato, sweet corn and basil all in one bowl, how can you go wrong?
 

Wednesday, July 14, 2004

They’re Here!

My Lapin cherries from ChefShop.com arrived just a little while ago. I took off early from work today so that they wouldn’t get overheated outside my door.


My cherries have arrived

I was not familiar with Lapin cherries, but selected them over the other varieties offered for two reasons: 1) the estimated shipment date didn’t conflict with my trip to NYC; and 2) the description at ChefShop claims that the Lapin cherry is Greg Batch’s (the grower) favorite of all the cherries.

While I believe the prices at ChefShop are generally very reasonable, shipping five pounds of cherries across the country by 2-day air on the day they are picked isn’t cheap. This was a big indulgence for me and the price per pound is not a number I want to think about. That said, I will now let the guilt go and enjoy my cherries!


Lapin cherries

When I opened the box, I was stunned by how beautiful they were. Unless they buried some ugly ones on the bottom, it appears that each cherry is perfect – deep red, unblemished, with a pert little stem. They are also huge! I allowed myself just one cherry before putting them away to chill, and it was wonderful. It was perfectly ripe – still a little crisp, but not overly firm – and very sweet.


Lapin, I think this is the beginning of a beautiful friendship

Tuesday, July 13, 2004

What is it?


Do you know what this is?

I bought this a couple of years ago at a flea market in New York City. I thought the ridged bakelite handle was cute and was curious what it might be. The woman that was selling it thought it might be an old-time vegetable peeler. I just couldn't see that and told her I wondered if it might be a butter curler. Well, I bought it and still have no idea what it is.

Tonight I put it to the test. I was surprised to find that it performed better as a vegetable peeler than a butter curler, but I'm still not convinced that is it's true calling.

Any ideas?


A butter curler?


A vegetable peeler?

Monday, July 12, 2004

Squash Fritters

On the way in to work this morning I was thinking about what to have for dinner and started forming the idea for these fritters. I wanted to use some of the produce I had bought at the farmers market yesterday – specifically the squash. I didn’t have any meat on hand, so I thought I might use eggs in some way. A frittata crossed my mind, but wasn’t exactly what I was looking for. Then I started thinking pan-fried patties with egg and squash and maybe some cilantro and Pecorino cheese (which all just happened to be in my refrigerator).

On the way home tonight I again was thinking about what to have for dinner, totally forgetting that I had been through this already. I settled on tortellini with some cooked vegetables (I apparently have much less ambition at the end of the day!). Fortunately, I recalled my earlier plan a few minutes later.


I used three different colors of squash in my fritters

Squash Fritters

Makes 4 or 5 fritters

3 to 4 cups grated summer squash and/or zucchini (3 or 4 small to medium squash)
2 eggs
2 tbs flour
2 tbs skim milk
2 tbs grated cheese (I used Pecorino, but Parmesan would work equally well)
2 tbs chopped fresh cilantro
½ tsp salt
¼ tsp freshly ground black pepper
olive oil
1 small tomato, chopped
additional cilantro for garnish

Put the grated squash in a large bowl and sprinkle salt over it. Stir well and then turn the squash out into a colander. Place the colander on a plate or in the sink and let the squash drain for 20 to 30 minutes.

Wring the squash out with your hands and then wrap in a double layer of paper towels and press out a little more liquid.

Beat the eggs lightly with a whisk. Add the flour, milk, cheese, cilantro, and pepper and whisk until there are no lumps of flour. Stir in the squash.

Heat a non-stick frying pan with a little olive oil over medium to medium-high heat. Using a large spoon, scoop some of the mixture into the pan and then flatten slightly. Repeat with the remaining mixture (I cooked mine in two batches). Cook a few minutes on each side until the fritters are light brown and cooked through.

Garnish with chopped tomato and cilantro.

Hope you enjoy these – I did!


Squash fritter

Sunday, July 11, 2004

Farmers Market

The way I was gushing about the Union Square Greenmarket, you’d think I didn’t have a farmers market closer to home. There are a couple of small markets close by, but my favorite local farmers market is FreshFarm Market at Dupont Circle in Washington, DC. It is held every Sunday year-round, and is a “producers only” market where the vendors are required to produce everything they sell.

It’s a bit of a schlep for me – it takes about an hour each way. I drive to the Metro station and then take the subway into town. Since it is such a distance, I haven’t had much success bringing flowers home. The fruits and vegetables, though, are well worth the trip.

Today was my first visit this year. There were already field grown tomatoes available (though not the many varieties that appear later in the summer), as well as corn, peaches, plums, beans, squash, cucumbers, and much more. There were some new vendors, including one selling bread and other baked goods, but I recognized many of the others from last year.

I tend to buy too much when I go. I do have to carry everything I buy, though, so there (fortunately) is a limit. Today I came home with a loaf of bread, corn, rhubarb, several types of cucumbers, several types of squash, tomatoes, peaches and soap. My refrigerator is stuffed – time to get cooking!


FreshFarm Market at Dupont Circle


So much to choose from!


Cherry tomatoes and wax beans


This is what I came home with today

Saturday, July 10, 2004

Dinner Tonight

I’ve made stuffed peppers before, but they’ve always been bell peppers. This afternoon I was browsing through the July issue of Gourmet and the recipe on page 46 for “Anaheim Chilies filled with Corn, Cheddar and Cilantro” caught my eye. It may have been partly that my brother has been talking about roasting Anaheims and Poblanos lately, but mostly it was just that it sounded delicious.

The recipe is fairly simple, but I did seem to dirty an awful lot of dishes. The most time-consuming part was preparing the peppers. I have an electric stove, so I roasted the peppers under the broiler – turning them every so often as the skin blackened. When they were blackened and blistered all over, I stuck them in a bowl and covered it with plastic wrap. The steam helps loosen the peel, so peeling them was easy, but I found that removing the seeds was a little tricky – I ripped at least a couple of the peppers in the process.

As you may have deduced from the name of the recipe, the filling had Corn, Cheddar and Cilantro in it. There was also some jalapeno pepper and onion. The recipe had a note from Gourmet’s food editors which explained that because the roasted peppers were so delicate, it was difficult to turn them seam side down as the recipe instructed, without the peppers splitting. I was glad to be let off the hook for that one – I happily left them open-faced.

The peppers were really, really good – the corn filling was sweet and crunchy with just a little heat from the jalapeno. The recipe is supposed to serve 4, but I managed to eat half the recipe all by myself!

After the dishes were done and I was looking at the recipe again, I realized it was from Annie Somerville’s Everyday Greens. Turns out I recently checked this book out of the library and that this is one of the recipes I had copied from it!


Anaheim Chilies filled with Corn, Cheddar, and Cilantro

Thursday, July 08, 2004

Fourth of July Feast – Part II

Bob and I started preparing for our feast Saturday morning with trips to the farmers market, Jefferson Market, and Murray’s Cheese Shop.

I love the Union Square Greenmarket! The produce is varied and abundant and the quality is amazing. In addition to the requisite fruits and vegetables, there are vendors selling meats, cheeses, baked goods, jams, plants, and lots and lots of gorgeous flowers. Bob had made an earlier trip, but we still needed a few things. We had to get a beet for the infamous beet paste, radishes for our salad, and of course – flowers. We managed to come home with much more, including a huge bunch of basil (for $2.00!) and red carrots.


Echinacea from the farmers market

Jefferson Market is Bob’s favorite grocery store. While Jefferson Market has beautiful produce, it is the meat counter that is the real star. Actually, when they were in the smaller space a few years ago, I thought of the place as a meat store with a few other things. They now have most everything you might need and, according to my brother, the service is great. We were here for the basics – eggs, sugar, flour, etc. We also got some wonderful breakfast sausage for Sunday morning.

Murray’s Cheese Shop was new for both of us. It is listed as a source in the Babbo Cookbook and since we needed some Pecorino cheese for the salad, we had a good excuse to make the trip. We didn’t spend much time there, but they appeared to have a huge variety of cheeses – plenty of which I’d never heard of before! We left with a young Pecorino for the salad and a chunk of Parmesan for grating.

Our shopping completed, it was time to get to work. We did some prep work for the salad and made the sour cherry jam that would top our vanilla ice cream. Sour cherries are hard to come by because they are so fragile. I don’t think I’ve ever seen them in the grocery store. Fortunately, they do have them at the Union Square Greenmarket. Bob had bought a quart which turned out to be just slightly more than the one pound that we needed. Pitting the cherries was easy with Bob’s new cherry pitter (Williams Sonoma sells these in their stores, but apparently not on-line) and the recipe for the jam (from the Babbo Cookbook) couldn’t have been simpler. Combine a pound of pitted sour cherries with one and a quarter cups of sugar in a saucepan over medium heat. Cook until the juices are released and then continue to cook until the jam is reduced to the desired consistency. We showed great restraint and didn’t dig into the jam until the following day, but it was incredible!


Sour cherries


Sour cherries and sugar - that's all!


Juices released


Sour cherry jam

With our sour cherry jam cooling in the fridge and Chuck home from work, we were ready to let someone else cook dinner for us that evening. Lucky us – we had reservations at Lupa!

Tuesday, July 06, 2004

Fourth of July Feast - Part I

I spent this past weekend in New York City with my brother and his partner. We had the most wonderful weekend. We saw “Much Ado About Nothing” in Central Park (fantastic!), had dinner at Lupa (yum!), celebrated my birthday a little early, “swam” in an inflatable pool set up on their terrace, and prepared a feast for just the three of us on the fourth.

Our menu:

Fava Bean and Pecorino Salad with Prosciutto
Red White and Blue Ravioli
Zucchini and Summer Squash with Pecorino Cheese
Flank Steak marinated in Bourbon and Soy Sauce
Vanilla Ice Cream with Sour Cherry Jam

My brother started talking about making red white and blue pasta for the Fourth of July weeks ago and it was definitely the major focus of our efforts this weekend. Early on we discussed how we might color the pasta. We considered using blueberries, but decided they would produce purple pasta rather than blue. Since we couldn’t think of any other possibilities for blue, we resorted to using blue food coloring. We decided to use beets for the red, having ruled out red peppers because one of us doesn’t like them.

We turned the kitchen upside down trying to produce the beet paste that we would use to tint the pasta red. First we wrapped a beet in foil and baked it. Then we peeled the beet, chopped it roughly and put it in the food processor. We were unable to get the consistency we wanted and thought it might have been because the food processor bowl was too big, so we pulled out the smaller bowl and tried it. We still had minced beets rather than a paste, so next we tried the blender. The mixture was too thick to circulate in the blender and it looked like we might have to give up on using beet, but Chuck came to the rescue and with careful prodding and pulsing succeeded in producing a perfectly smooth beet paste.


Our finished beet paste (finally!!)

Normally, you should incorporate your coloring agent into the eggs and then combine the egg mixture with the flour. Because we were dividing the recipe into three portions, each with a different color, we decided to add the coloring after the eggs were combined with the flour. Adding a few drops of blue food coloring in this way was not a problem, but adding more than a tablespoon of beet paste was. Chuck was persistent in working the dough and it finally came together. We added some more flour to compensate for the liquid in the beet paste and ended up with “red” dough that handled equally as well as the blue and the uncolored “white” doughs.


White, red and blue dough

We used a spinach and ricotta filling that we prepared from a recipe in Pam Anderson’s “How to Cook Without a Book”. We chose a triangular shape for the ravioli because it seemed simplest and, I rationalized, it was sort of like a folded flag. We started with the white dough and were a little slow at first. But by the second batch we were adept at kneading and thinning the dough in the pasta maker, and had set up a production line for cutting, filling, sealing, and trimming the ravioli. It was amazing that the three of us could fit in that tiny kitchen (but what a beautiful kitchen!) and get anything done, let alone produce over 100 ravioli!


This gives you a good idea how small the kitchen is - the stove and fridge are on the left and the sink and dishwasher are on the right


A good view of the kitchen


Thinning the dough


Red ravioli not yet cooked

In the end our red pasta was more salmon-colored than red and our blue pasta bore a marked resemblance to play dough, but my brother’s vision was realized – we had red white and blue pasta for the Fourth of July!


Cooked...


...and plated


And this is Bill, whose only job was to be a sweetie

Thursday, July 01, 2004

Long Weekend in NYC

I’m off to New York for the weekend. I’ll be spending it with my brother and my dearest friend. The three of us will play and cook all weekend. Hope you have a happy and safe 4th!