Wednesday, December 05, 2007

Crochet: Betcha don't have potholders like these!

OK, just one more potholder post - I promise! After finishing with yesterday's post I remembered some potholders my mom had. Then it occurred to me I probably had them somewhere. I dug around in all the likely places (NOT the kitchen) and found them! My mom had pinned a note to them indicating that they had been made by her Great Aunt Emma and given to my mom at her bridal shower. I wish I could say more so you'd have to scroll down to see the photo... because they really should be revealed with a big TA-DA...


Yup - they're his and hers and they've got openings at the top and legholes just like the garments they're modeled after. They're a little two-dimensional, but that's sort of a requirement for potholders. I don't think these potholders have ever done duty in the kitchen, though with those handy loops perhaps I should hang them on the fridge just as a conversation starter!

Tuesday, December 04, 2007

Crochet: Old Fashioned Potholders


If you're looking for a last-minute homemade holiday gift for someone who likes to cook, how about some potholders? I grew up with potholders like this - they'd been crocheted for years by various women in my mother's family. I think some of the potholders we used (and possibly some of the ones I still use) may have even been made by my great-grandmother. The older potholders are typically yellow and white or red and white, but once my sister and I started making them we naturally gravitated to all kinds of colors and even those garish variegated threads.

I made the pair above for Bob two Christmases ago and they pretty much follow the pattern of their predecessors - a dark center with a good-sized white middle enclosed by a dark border. I was running out of blue so I introduced a third color in the one on the right, but that's probably as heretical as using variegated thread :) The older ones in my possession have the remnants of little picots at each corner of the border, but I never figured out how to do those and frankly was never inclined - it's a potholder after all!

I think I learned to crochet by making these potholders. It was either my mother or Auntie Bee that showed me how, though it's not a pattern that's written down (until now) or memorized. I don't know about the earlier potholder-makers in my family, but I can't make one without having a completed one to look at. I've never felt that I made the middles quite right, since I always end up with a little larger (often lopsided) hole in the middle, but I think these instructions will set you in the right direction and then you can refine them to your liking. Switch colors as you like - it's your potholder!

I'll apologize in advance about this pattern - I'm not well acquainted with crochet patterns, so this may not be very clear. Please feel free to email me if you have any questions!

The potholder is made of two identical pieces (though the color patterns need not be the same) that are joined by one more round that is worked through both pieces. I use a size 7 steel crochet hook with regular (size 10) cotton crochet thread.

Chain 7 (or less - I was just thinking that maybe there's a sneaky way to do this on just a loop of thread so you could pull it tight and close up that little hole in the middle) and join to form a loop.

I usually join each round by pulling a loop through and then chaining two.

Round 1 - work 10 single crochet (sc) in the loop and join.

Round 2 - work 2 double crochet (dc) in each sc (20 dc total) and join.

Round 3 - work 2 dc in each dc (actually it's really in the spaces between the dc) (40 dc total) and join.

Round 4 - in this round you establish the "corners" of the potholder where all the remaining increases will occur. Work 4 dc in the space between the first two pairs of dc and then 2 dc in each of the next 3 spaces. Repeat this four more times and join.

Rounds 5 - 11 (you can do more or less depending on the size potholder you want) - continue in the same way as round 4, always working 4 dc at each corner and 2 dc in the spaces.

** Update 8/16/08 - I just made a couple potholders by following the pattern as I wrote it here and realized that 11 rounds is a little small. I'd recommend 12 to 13 rounds for each piece and then join with another round as described below. **

When done, join, cut the thread and pull it through. Weave cut thread ends into the wrong side of the potholder to secure them and hide them. Work the other piece of the potholder in the same way, but don't cut the thread.

To join the two pieces, put the wrong sides together and work one more round in the established pattern. For this round you'll need to work through both sides, being careful that they are lined up correctly. When done, join, pull the thread through and weave in the end.

I think these potholders improve with age - they tend to tighten up and flatten out. They're not as big or thick as some potholders, but I think they're just right!

A few years ago I was browsing in a little antique shop in Greenwich Village and found some very similar potholders for just $2.00 each! Of course I bought all three. The increases are done differently and they have six sides rather than five. I haven't attempted to figure out the pattern yet, but hope to someday. I'll close with pictures of them (they're light green and white) and of some of my older potholders (the rust and white one is one I made a few years back, but the others are much older). If I'd planned better, I would have washed them before taking the picture - sorry!


Sunday, December 02, 2007

Finally...What's Next

I'm so sorry... I fully intended to write about my plans for after Mondays with Maida two weeks ago. But between Thanksgiving and being rather lazy, it just didn't happen. Part of the problem may be that I'm not feeling quite ready to get started on it, so let's consider this just a little sneak peek to tide you over until the "official" announcement - OK?

I've been thinking for several months that I'd like to examine American regional cuisine by looking at one state at a time and trying to figure out what foods are typical of each state. I started looking around some on-line and reading a little and quickly came to the conclusion that in order to get a grasp on the nature of a particular state's cuisine, I would also have to learn something of its agriculture and history. Throw in there an interest in food festivals, state fairs, and a wish to include food blogs, and you might begin to see my problem... maybe scope creep?

I obviously still need to sort out some details, but here's the general plan... I will focus on one state per month starting first with the states where I have lived and then moving on to those I have visited and finally on to those that are completely new to me. I'm calling the project "State by State" (and if you're familiar with Anne Lamott's Bird by Bird, you'll know why). I plan to end each month with a post that is sort of a reference for the state, including a directory of food blogs based in that particular state, books I used, etc.

I'm going to start in February with Maryland. After that will come Massachusetts, North Carolina, Vermont, and New York. After that? We'll see :)

Between now and then I'm going to enjoy the Christmas season and I'm planning to take Zarah up on her invitation to "join the madness" as she calls it. I won't be posting daily as she is, but I would like to do a few seasonal posts. Then in January I hope to finally do a little redecorating around here: switch to a new Blogger template so I can take full advantage of tags, etc., and get a new look.

So that's what's coming - guess I'd better get busy :)

Friday, November 16, 2007

45 Pounds of butter later...


Honestly, I was afraid it was going to be more than that, but even at 45 pounds, that's 180 sticks of butter - more than one stick per recipe! Here's a few more numbers to marvel at:
  • 210 eggs
  • 256 cups of flour (and that doesn't even include whole wheat, etc.)
  • 178 cups of sugar (including granulated, brown and powdered sugar)
  • over 24 pounds of nuts
  • almost a pint of vanilla extract
  • over a cup each of baking powder and baking soda
  • almost a cup of cinnamon
There were five of you who took a stab at guessing the totals for butter, eggs, flour and sugar. The way I calculated a score for each contender was to divide the difference between the guess and the actual number by the actual number and then sum those results for each of the four guesses. The lowest score wins. Here are the results:

Lisa guessed 37 lbs of butter, 150 eggs, 250 cups of flour, and 150 cups of sugar, giving her the best score of 0.644

Nupur guessed 35 lbs of butter, 150 eggs, 200 cups of flour, and 250 cups of sugar, giving her a score of 1.131

Claire guessed 75 lbs of butter, 200 eggs, 300 cups of flour, and 250 cups of sugar, giving her a score of 1.291

Mari guessed 20 lbs of butter, 130 eggs, 130 cups of flour, and 70 cups of sugar (what an optimist!), giving her a score of 2.035

Elijah guessed 50 lbs of butter, 120 eggs, 500 cups of flour, and 400 cups of sugar, giving him a score of 2.740

So Lisa wins it! Congratulations! Nupur and Clare are the runners up. Clare is the only one of the three that wanted a copy of the book, so she wins the copy of Maida Heatter's Book of Great Cookies. Since Lisa is had the best score, she can choose which of the other two prizes (the small appetizer tray or the pewter pushpins) she'd like and then the other prize goes to Nupur. Thanks to all the guessers! Winners - send me an email with your address and I'll send your prize on it's way!

Wednesday, November 14, 2007

Top Cookie


Nine of my personal top ten from Maida Heatter's Book of Great Cookies

Oh what a struggle! Limiting the list to ten was actually the easy part, ranking them was near impossible. I have a feeling if I did this again in a day or so, the order would be very different. The nine runners-up are pictured above and listed below. Top Cookie (which after all the angst was the one thing I was sure about) is pictured below. If there's one thing I've learned after making and serving all these cookies, it's that everyone has a different idea about what makes a good cookie. I doubt anyone else would choose the same cookies I did for their own personal top ten, but I'm certain any cookie lover will find at least one to love on this list...


10. Austrian Walnut Crescents

9. Plain Old-Fashioned Sugar Cookies

8. Tijuana Fiesta Cookies

7. Chocolate Mint Sticks

6. Hamantaschen

5. Pumpkin Rocks

4. Viennese Chocolate Walnut Bars

3. Texas Cowboy Bars

2. Cobblestones


and drumroll please! Top Cookie is...........


1. Big Newtons!!!!!!!


By the way, I just discovered that Jessica's Biscuit redesigned their site and all the links in my past Mondays with Maida posts to the "old book" are now obsolete. They still carry the book though, and I've put the updated link at the top of this post. For under $13, it's a steal - I think I can say that with authority :)

Don't forget to post your guesses in the comments by Thursday night - see here and here for more details.

Finally, huge thanks to the members of the cookie panel past and present. They did what I couldn't - rate the cookies - and in the process made it fun for everyone. So, thank you Phil, Suzanne, Denny, Laura, Terri, Drucie and Herman - I honestly couldn't have done it without you!! (And don't forget about their Top Ten list, which is quite different from mine.)

Tuesday, November 13, 2007

My Favorite "Et Cetera" Cookies

Tea and cookies
Love it when I miraculously capture a curly wisp of steam. Love these tea bags from Bob and Chuck too. The Almond Tartlets weren't bad either, but didn't quite make it to my list of favorites.

This is a chapter of cookies that didn't fit into any of the previous chapters, so it's sort of hard to characterize them as a group. There were several tartlets, several baked as loaves and then sliced, and a smattering of others. Many were beautiful to look at, but few achieved cookie greatness - or have I become jaded and hard-to-please when it comes to cookies? Others have suggested to me (and I think it is true) that the order that the cookies were presented to the cookie panel probably had some bearing on their scores. I'm sure the same is true for me - the first chapter was approached with great enthusiasm, this last with a sense of obligation.

This chapter was heavy on the almonds and I feel to a certain extent that the almonds let me down more than the recipes. In almost every case I'd be inclined to toast the almonds if I were to try the recipe again. This chapter also had some of the most challenging recipes - the tartlets aren't difficult, but they do take time - lots of it. And there must be a trick to those macaroons that has escaped me.

But in spite of my waning interest and technical difficulties, there were still a handful of recipes that I would make again in a heartbeat. So without further ado, here are my favorites...


Connecticut Date Slices
These moist and chewy, sweet and spicy Connecticut Date Slices are the pinnacle of cookie comfort!


Fudge Délices
This is one of those cookies that gave me some difficulty, but in spite of my troubles these Fudge Délices truly were delights!


Black-and-White Rusks
On the other hand, making these Black-and-White Rusks really was fun and the resulting orange and chocolate cookies? Heaven! In fact, they narrowly lost out to the next cookie as my very favorite...


Hazelnut Rusks
Hard on the teeth and not much to look at, but these simple Hazelnut Rusks let all those fragrant hazelnuts shine through. Eat them plain if you dare, or dunk them in your hot beverage of choice - either way, I think you'll love them as much as I did.

Almost done! All that's left is to name my own personal top ten from the book and reveal the winners of my little guessing game. There's still time to post your guesses about the total pounds of butter, number of eggs, cups of flour and cups of sugar (all kinds) required to make each recipe in the book once. I have one copy of the old book and a couple of other small prizes (a small maple appetizer tray from J.K. Adams in Vermont and a set of pewter pushpins with a culinary theme) to award to the closest guessers. All answers must be posted in the comments by midnight EST Thursday, November 15th.

If you just stumbled here from Google or elsewhere, we're talking about Maida Heatter 's wonderful book of cookies called Maida Heatter's Book of Great Cookies. The book is out of print but still available as a remainder, used, or in your library. All but one of the recipes were also reprinted in the newer Maida Heatter's Cookies which also includes cookie recipes from a couple of her other books. Read about my little project here and start here if you're interested in exploring my earlier posts.

Monday, November 12, 2007

Mondays with Maida - Cheese Pennies

Marshmallows
Page 269 in the old book / page 287 in the new book

This is it - the VERY LAST ONE!! But before the celebrating begins, I've got some business to attend to - these Cheese Pennies. I've seen recipes like this before and honestly wasn't all that excited about this one before I made it, but I wound up being nearly as enthusiastic as the cookie panel. First I like the size - despite the name, these are a generous 2+ inches across; second- the dough is easy to mix, shape and slice; and finally they taste great.

I used 1/2 teaspoon of cayenne (actually, red chilli powder from the Indian grocery which I think is the same) and to my taste you would want no less. They had a warmth and spicy bite to them, but not so much to make you run for a glass of water. With 8 ounces of cheese and 4 ounces of butter, these are very rich crackers. The hot pepper heightens the cheese flavor and cuts through that richness - sort of like very nippy Cheez-it crackers.

I think the instructions given for toasting sesame seeds are fairly standard, but I found the time and or the temperature were way too much. When you start smelling them you should watch them carefully. Instead of the recommended 15 or 20 minutes (at 350 F), I'd start checking after 6 or 7 minutes.

The dough can be kept in the refrigerator for several days, which makes this a great do-ahead recipe for a dinner or party. Slicing them is a breeze - the dough holds together really well and there is nothing in the dough (like nuts or seeds) to catch on the knife. Maida says not to put the dough in the freezer, but I think that is just because you don't want to slice it frozen. I'm guessing you could freeze it and then let it thaw in the refrigerator for a day or two if you wanted to mix the dough more than a few days ahead.

I thought for sure Denny would cut me a break and not dock points for no chocolate in a cheese cracker, but nooo... Here's the panel ...

Suzanne: "First of all I love anything with sesames and I also love cheese. So I was in seventh heaven with the crackers. Cathy used a sharp cheddar cheese with quite a zing to it. I needed a drink of water to cut the sharpness of the cheddar. I’d like to thank Cathy for making me famous by asking me to be a participant in her blog. I’m sure my prophetic words will go down in cookie history. Each week, the whole office lived in anticipation wondering what delicious cookie Cathy would bring in to entice our palettes. In sincerity, it has been a pleasure knowing Cathy and being part of the blog. I’ll be reading your blog from California. Rating - 5.0"

Denny: "The taste really surprised me because I didn't know what they were. These were excellent - light and tasty. 4.0 which is the highest you can get with the -1 no chocolate penalty. Rating - 4.0"

Laura: "Spicy and cheesy with a nutty crunchy sesame topping. Very yum! Rating - 4.5"

Terri: "These would make a delicious appetizer. Cheesy, spicy and not too filling. I would love to eat them with a glass of red wine! The sesame seeds on top add a nice texture. Rating - 5.0"

Overall rating by the panel - 4.6

And that is all she wrote! But it's not quite all I wrote... tomorrow I'll share my favorites from the chapter and then Wednesday I'll compile my own top 10 list from the book.

OK, Here comes the celebration part... just for fun, I'll tally up how much butter, nuts, flour, sugar, etc. I used during the course of this project. Anyone want to hazard a guess? Leave a comment with your best guesses to the answers to these questions: 1) How many pounds of butter? 2) How many eggs? 3) How many cups of flour? 4) How many cups of sugar (all kinds totaled together)? Also let me know if you have a copy of the book or not (or if you'd like one for someone else). I have one copy of the old book (a brand new copy) to give away and two other little prizes for the closest answers. You must post your answers by midnight EST this Thursday (11/15). I'll post the totals for these and a few more ingredients on Friday and announce the winners.

What's next? I'll tell you all about that next week!

Nutrition Facts

update: regarding my little celebratory guessing game - a question about what would be included in the totals was raised... the ingredients for each and every recipe in the book will be counted once. No matter if I've made the recipe one time or ten times. The other clarification I'll add is that I'm going to add egg yolks and egg whites together (10 yolks + 10 whites = 10 eggs) when coming up with a total for eggs, but if I have 10 extra egg whites, they'll count as 10 eggs.

Monday, November 05, 2007

Mondays with Maida - Marshmallows

Marshmallows
Page 267 in the old book / page 293 in the new book

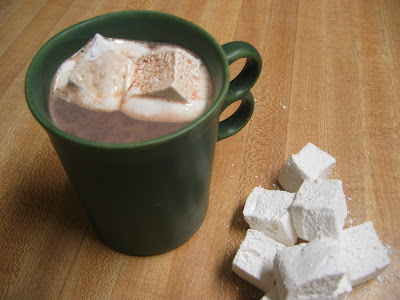
No more cookies, but Maida ends the book with a couple of lagniappes. First up - marshmallows. If you've never made marshmallows before, it's worth doing at least once. It's really not difficult, and the end result is very satisfying. Maida points out that few people know what marshmallows are made of, and my experience was similar. In fact, one person seemed to think I had made my marshmallows from... marshmallows!

Marshmallows are made from gelatin and a sugar syrup (actually a combination of sugar and corn syrup). The hot sugar syrup is beaten into the gelatin, forming a dense foam that sets as it cools. Maida's recipe uses only vanilla as the flavoring, but Jocelyn over at Brownie Points gives a recipe for strawberry marshmallows along with lots of flavor variations. When you figure in coatings, etc., the possibilities are truly limitless.

I have it on good authority that Maida Heatter's mixer of choice is an old Sunbeam, so I was a little concerned that the 15 minutes beating time would be too much with a Kitchenaid. I decided to use the paddle rather than the whip (the last time I made marshmallows the recipe called for a whip attachment and had a beating time of 5 to 7 minutes). Beware - there'll be hot syrup flying around at first, so I wouldn't crank it all the way up right away. I started at 6 and moved up to 8, then briefly to 10, but decided to keep it at 8. I didn't think about using the pouring shield until afterwards, but if you have one use it. I beat the mixture about 13 minutes and then started worrying about the mixer overheating and decided that was enough. In fact, it was probably too long - I had trouble spreading the mixture in the pan. Rather than using aluminum foil and shortening, I lined the pan with parchment and oiled the parchment lightly.

Here's the panel ...

Suzanne: "Yum! These were delicious. I could definitely have a few of these. The marshmallows had just the right amount of sweetness. I’d love them in hot chocolate or roasting them over a fire. Rating - 5.0"

Denny: "I'm not a marshmallow person, except for s'mores, but these were very good. 3.0 with -1 penalty. Rating - 3.0"

Laura: "Yummy and gooey... like a spoonful of fluff dipped in powder sugar. Rating - 4.5"

Terri: "These are much better than the store-bought-in-a-bag type marshmallow. The difference is they aren't as airy and they're softer. Absolutely delicious! Can't wait to try them on hot chocolate tonight. Rating - 5.0"

Overall rating by the panel - 4.4

Next week - Cheese Pennies

Nutrition Facts

Monday, October 29, 2007

Mondays with Maida - Palm Island Brandy Snaps

Palm Island Brandy Snaps
Page 264 in the old book / recipe is not in the new book

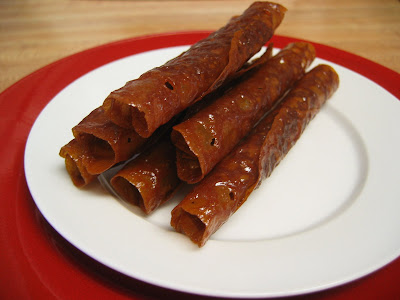
There are still a couple more recipes in the book, but this is the last cookie! At first I was feeling a little let down with this recipe, but the next day my impression changed somewhat. These cookies are not satisfying in the way a crunchy/chewy cookie with raisins or chocolate chips would be, but they do have a pleasing, fragile texture and lots of flavor.

These are actually drop cookies that spread out to an ultra-thin layer. After cooling for a bit, they are rolled around the handle of a wooden spoon to form tubes. I didn't try Maida's serving suggestion - rolling them around something wider like cannoli tubes and filling them with whipped cream - but they could easily be turned into a very elegant dessert. I think the whipped cream would be a really nice contrast to the strong molasses and ginger flavor of the cookies. Maida explains that the recipe is an old one from England and that the filled tubes would be served with satin ribbons tied around them(!)

Maida also goes on that they are "fun to make". Welllllll.... if your idea of fun is handling molten sugar with your bare hands, then yes, these are most definitely fun! They may not make the cut as "fun", but they are easy, though I did end up with some sore fingers. They are also time-consuming, since you bake just five cookies at a time.

What surprised me was that despite the difficulties of handling something so hot, the hot cookies were relatively sturdy, so rolling them wasn't the problem I envisioned. When properly cooled, they resemble (hot) fruit leather, so there is little risk of them tearing. The trick is giving them just enough time to cool. With my first batch I waited the prescribed one and a half to two minutes, but found the cookie was impossible to pick up. I assumed they were undercooked and put them back in the oven. Later, though, I realized that the problem was that they need more cooling (rather than cooking) time. I found the 8 minutes for baking was perfect, but that 2 minutes cooling wasn't enough - 3 minutes worked well for me. I suppose the cooling time may vary depending on how much heat your cookie sheets retain, so try them at 2 minutes, but then wait another minute if you can't easily lift the edge of the cookie with a knife or thin spatula. If the edges of the cookie become brittle before you've rolled them, you've cooled them a little too long.

Here's the panel (don't worry, the panel WILL be back for the last two recipes despite what appear to be parting comments from Suzanne and Denny)...

Suzanne: "I was really looking forward to the last cookie being extra special. Unfortunately, I don’t care for anything with ginger in it. The cookie was very attractive, tubular in shape and shiny. I took two bites of the cookie but wasn’t able to finish it since it has such a strong ginger taste. I know Cathy put a lot of time and effort into making the cookie and felt bad that my last comment couldn’t be favorable. I do think it’s fitting that the end of the book falls during the same week that I am retiring. Otherwise, I would need to come back weekly from California to taste the cookies and write my comments. This has been great fun, Cathy and I will keep reading your blog in my retirement. Rating - 1.0"

Denny: "Very good. Light and fancy with an almost chocolate flavor. Great "show" cookies. Since they taste almost chocolate, I only gave them a minus .5, so my rating in 4.5. A great ending to a long arduous journey. Yuk Yuk. Thanks very much. Rating - 4.5"

Laura: "These are yummy! They are light and crunchy and candy-like. They almost melt in your mouth. The flavors remind me of the Christmas holidays. Rating - 4.5"

Terri: "These are delicious and I didn't detect the taste of brandy. These are more like crystallized ginger snaps. The crunchiness and texture are great and the flavor has a bit of molasses. I really liked that these were rolled and thought they would be delicious with ice cream - any flavor. Rating - 4.0"

Overall rating by the panel - 3.5

Next week - Marshmallows

Nutrition Facts

Monday, October 22, 2007

Mondays with Maida - Black-and-White Rusks

Black-and-White Rusks
Page 262 in the old book / page 279 in the new book

These two biscotti-like cookies - last week's Hazelnut Rusks and this week's Black-and-White Rusks - have left me wishing there were more like them in the book. I've had little prior experience with this type of cookie, but have especially enjoyed these two. Fortunately, there's a whole chapter of biscotti to be explored in Maida Heatter's Brand-New Book of Great Cookies!

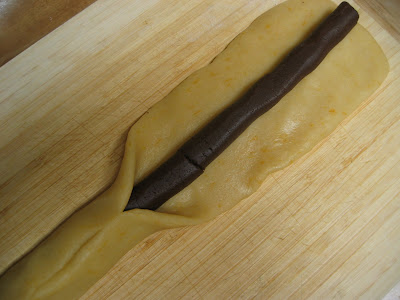
These lovely two-toned cookies have two flavors as well. The outer layer has grated orange zest in it and the middle has some melted chocolate added to it. Forming the roll isn't difficult and the dough is generally easy to handle, though I did find the chocolate dough became somewhat brittle with time. This is another cookie for you former Play-Doh lovers :-) Both the middle and outer layers are rolled on a board into long ropes. The outer layer is flattened and then pulled up around the middle chocolate rope. The long oval shape of the individual slices is achieved by cutting on a very sharp angle after baking.

Black-and-White Rusks

These cookies are a little easier on the teeth than last week's, thanks to half a cup of oil in the recipe, but they are still quite crunchy. The combination of chocolate and orange is wonderful and their looks and durability would make them ideal for holiday gift giving and even mailing.

Here's the panel (don't listen to Denny)...

Suzanne: "Delicious! I love everything about this cookie. I love the smell of the orange and the crunchiness of the cookie. The cookie was so attractive with its thin, angular shape and chocolate in the center. I’m sure I will be eating more then one of these cookies. Rating - 5.0"

Denny: "OK, but not much flavor. Maybe they should be thrice-baked with a real good cookie on top and another on the bottom. Even with the chocolate I could only give them a 2.0. Rating - 2.0"

Laura: "Zesty orange flavor with a hint of chocolate. Yum! A little more crunchy than I usually like, but it works for this cookie. Rating - 4.0"

Terri: "These are very much like biscotti and very tasty with the touch of chocolate in the middle. These are quite crunchy but would be perfect with tea or coffee. The slight orange taste adds a nice touch of flavor! Rating - 3.5"

Overall rating by the panel - 3.6

Next week - Palm Island Brandy Snaps

Nutrition Facts

Monday, October 15, 2007

Blog Action Day 2007

Bloggers Unite - Blog Action Day

Today is Blog Action Day - a day for bloggers to help get people thinking and talking about the environment. These days the environment is on everyone's mind as things like global warming become reality and not just a future worry. If you're not already convinced that you personally need to take steps to try to minimize your impact on the environment, I will leave the convincing to other, more eloquent writers (thousands of which you should be hearing from today). But if you like me have come to the realization that you must make an effort, however small, to minimize your impact on the environment, then let me toss out a few ideas. The basic goal is to use less. Most of these aren't terribly original, but it's a start...

You've heard it before - eat local. Eating local reduces the resources required to transport your food. My produce purchases got a little more local this year... I used to make regular trips to the farmers market at Dupont Circle which took me about an hour each way by car and subway. I expect I'll still make occasional visits, but I've now started frequenting a nearby (3 miles from my house) farmers market and have signed up with one of the three farmers there for her CSA next year. I obviously do much better with this in the growing season than in the winter, but I'm trying at least to be conscious of where my food originates and choosing the closer location when possible. I weigh in other factors, including cost and whether or not it's organic, so I don't always go with the most local product, but at least it now figures into my purchasing decisions (which was not the case a year ago).

Use a pressure cooker. Fond as I've become of Indian cooking, I guess it was inevitable that I would purchase a pressure cooker. The vegetarian cuisines of India make good use of beans and lentils in whole and split form (dal) and a pressure cooker makes preparing them so much easier. So what's the benefit for the environment? Pressure cooking reduces the cooking time (and therefore the energy required) by half to two thirds. I think many people my age regard pressure cookers with a little trepidation - my mother used hers (a gift from my dad) once or twice to make my dad happy, but feared it for its reputation of being prone to violent explosions of hot liquid. You can put those fears aside if you buy a modern pressure cooker - there are so many safety devices incorporated into the design these days that you'd have to work pretty hard to get the thing to explode.

Don't pay for water in your food. No, I'm not talking about bottled water (but if you're buying bottled water, you really should reconsider), I'm talking about water in processed products. I remember talking with Nupur about coconut milk - she was using some in that marvelous pasta dish she'd whipped up and I brought up the subject of "lite" coconut milk. She dismissed the product saying that it was just watered down coconut milk and she wasn't going to pay for water. The more I think about that statement, the more I see the wisdom in it. When there's water added to a product in manufacturing, you end up paying to transport that water and maybe even for extra packaging to contain the water. For example, If you eat lots of beans, you can save a small fortune cooking dried beans (with your new pressure cooker! ) rather than buying canned beans. By purchasing a pound of dried beans you're purchasing a product that weighs (and costs) less than one can of beans and getting something that provides over three times the quantity of cooked beans.

Don't pay for water in your cleaning products. Go with powdered or concentrated products when possible to reduce packaging and transportation costs. For reasons completely unrelated to environmental concerns (I thought I was having trouble with the liquid one, but it turned out to be something I was doing wrong), I recently started using powdered dishwasher detergent. It works just as well, costs less and weighs less - win-win! I haven't reverted back to powdered laundry detergent yet since I still have a little stockpile of liquid detergent to work through, but I'm not sure if the benefits there would be the same. I'll have to compare weight and recommended amount to use per load to figure out if would be worthwhile to switch. For years I've been using a floor cleaner (Sh-Clean) and general household cleaner (called Red Juice - it's similar to Product 409) put out by the Clean Team. I'm not a very good customer though - I'm still working through my original purchase! Red Juice is concentrated 10 to 1 and Sh-Clean is concentrated 20 to 1, so each makes many bottles of product once diluted.

Limit use of disposable products. You don't know how automatic it had become for me to stick leftovers into a sandwich bag or package my lunch (on those rare occasions that I packed one) using umpty-ump little bags. Now I try very hard not to use them at all. For lunch I use plastic containers (glass with a plastic snap-on lid if it will be reheated in the microwave), at home I use plastic or glass storage containers or bowls with plates set on top. In addition to purchased containers, I've accumulated quite a collection of yogurt containers (another great idea from Nupur - they're the perfect size for storing dals and beans) and glass jars (nice for spices and spice mixes). I also try to limit my use of paper towels - I use cloth rags and sponges for cleaning. I stick a half-size towel in packed lunches as a napkin and still use paper towels for food-related things (like putting into a container with leafy vegetables and herbs to absorb excess moisture). I haven't started using cloth napkins... but I'm thinking about it! I recently realized that one of my most wasteful purchases (in so many ways) - was my near daily trip to Starbucks for lunch. The sandwich or salad comes packed in a plastic container, then there's the big paper cup, napkins, etc. I've started bringing my lunch to work at least twice a week, but was stumped on what to do about the coffee cup problem because I'm just not ready to give up my daily cuppa! I mentioned this to Bob and he said "don't they sell commuter cups?" Of course - brilliant! (Why didn't I think of that?)

Use reusable shopping bags. I'm good about this at the grocery store and farmers market, but need to think about this for other shopping trips as well. I also keep a few clean (reused) plastic bags in each shopping bag for holding small or wet produce items.

Take short showers. I got this idea from Kelli. It's perfect for me in so many ways - I was queen of the 20-minute shower. I'd stay in until the hot water ran out or I was late for work - whichever came first! Kelly suggested using a timer and aiming for a 5-minute shower. I think I've only finished in under five once, but six minutes is definitely doable! I still have an occasional set-back here and it's going to be even harder when cold weather arrives, but even if I only do it every other time, it's a huge water and energy savings.

Cut back on book purchases. Books are my most frequent impulse purchase. I really don't buy much in the way of clothing or household items, but books? Amazon is way too convenient. I've been doing some research on-line for my post-Mondays with Maida project and have found Google Books to be an invaluable tool. If you get lucky, all or part of the book you're interested in will be available on-line as a preview. If not, there are links to Amazon and other booksellers, but first try searching for it in your library. Click the link the says Find this book in a library, provide your zip-code, and you'll get a list of links to nearby libraries with the book thanks to Worldcat. I've yet to make use of my library's inter-library loan, but very often the book I want is available right in my local library. If it's not, then I check to see if a used copy of the book is available through Amazon. You can get some amazing deals buying used books, though you're always going to pay at least $3.99 for shipping and handling. When choosing which copy of the book to buy, consider the location of the dealer in addition to quality and price. Shortening the distance the book has to travel is good for the environment, yes, but it also will get the book to you more quickly :) One other interesting option for books is BookMooch - a book-swapping site. This may not be the most desirable option for the environment, but if you choose not to participate in swaps outside your country and reuse mailing materials, maybe it's not so bad!

Grow my own. Aside from my blueberry bush, my garden has lain fallow for a couple of years now. One of my goals for next year is to revive my herb garden. It's not really feasible for me to grow anything else, since our community is overrun with deer, but herbs (and, oddly, blueberries) are apparently not to their liking. Herbs are perfect for home gardening in so many ways. Unusual varieties are easily grown from seed; being conveniently located just outside allows you to pick as little or as much as you need; and they are mostly happy without much watering.

Reduce food waste. I struggle with this one and though I have it as a goal for next year, I worry that having the CSA may actually aggravate the problem. I think the answer will involve making better use of my freezer, sharing food more often, and cooking more creatively.

Compost. I once had a compost pile and another goal for next year is to resuscitate the compost pile. I'm not cooking meat at home any more, so nearly all my food scraps should be compostable.

Well enough about me - what are your ideas? I'm very interested in any other suggestions you may have. Feel free to mention them in comments below or if the spirit moves you, write your own Blog Action Day post - there's still time!

Mondays with Maida - Hazelnut Rusks

Hazelnut Rusks
Page 260 in the old book / page 277 in the new book

I guess Maida's cookie book was written before biscotti were all the rage. Maida describes this recipe as an old German recipe and there's nary a mention of those other twice-baked cookies we've come to know and love as biscotti. To head off any complaints that the cookies were too hard or lawsuits related to chipped teeth, I warned everyone that they were indeed like biscotti and advised they might want to dunk the cookies in their favorite hot beverage to soften them up. Some dunked, others braved dental disaster and ate them dry, but everyone (including me) enjoyed these tasty cookies.

I had toasted the nuts very lightly beforehand because I was worried that they were bland. I had purchased them blanched rather then attempting to remove the skins myself (a task that I find particularly onerous). I'm not sure what process is used commercially to remove hazelnut skins, but my guess is that it is not toasting followed by rubbing the nuts in a dishtowel - the nuts I'd purchased appeared to have been mechanically abraded and sure didn't taste toasted. Anyway, five minutes in the oven perked them right up and perfumed my kitchen as well. Is there any nut with a more heavenly scent than the hazelnut?

The cookies were very easy to make. The one step I worried about just a little was neatly slicing the baked cookie strips. I remember the first time I ever made biscotti I had a terrible time cutting through the nuts. That was thankfully not the case this time around, thanks to my bread-knife. The only trouble I did have was getting those half-inch slices to stand upright for the second baking - they were acting more like dominoes then cookies!

Here's the panel...

Suzanne: "The Hazelnut Rusks were delicious. They reminded me of the mandel bread cookies that my aunt used to make. They were definitely hard and yes, I did need to dunk them to soften them up, but the dunking was part of the fun. This was a great morning breakfast cookie. Rating - 4.0"

Denny: "Excellent. Just a tad too crunchy. I considered suspending my No Chocolate penalty because they were so good, but I've got to be consistent. I'd give them a 4.0 with the -1 no chocolate penalty. I could even taste the hazelnuts. Rating - 4.0"

Laura: "Very tasty, once dunked! (Without dunking, they are indeed very hard.) Rating - 3.5"

Terri: "These are definitely like biscotti and were delicious dipped in my coffee! Since they're twice baked, they're crunchier than usual, but very tasty. The hazelnuts are delicious. Very good, but maybe not for anyone worried about losing fillings or chipping a tooth! Only kidding - they're not that hard! Rating - 3.5"

Overall rating by the panel - 3.8

Next week - Black-and-White Rusks

Nutrition Facts

Monday, October 08, 2007

Mondays with Maida - Basler Brunsli

Basler Brunsli
Page 258 in the old book / page 276 in the new book

At times like this, I find myself wishing there were a few photos in the book. These cookies are supposed to be bars, but between my messy cutting and a dough that probably could have (and should have) been stiffer, they were more like squarish blobs. But I'm not going to complain much, because aside from appearance they turned out as advertised. They were indeed "light colored and crisp on the outside -- dark, moist, and chewy on the inside".

And sweet. Oh my gosh are they sweet. They have a lovely complex flavor, that tempers the sweetness slightly, but these cookies are still achingly sweet. Several ingredients contribute to their unique taste - chocolate, cinnamon, cloves, and kirschwasser. No one dominates, instead they meld together into something that is dark and delicious.

The dough, which is basically a meringue with ground almonds and the above mentioned chocolate, cinnamon, cloves and kirsch, is formed into a rectangle and left for an hour to firm up before being cut into bars. My dough was still pretty soft and gooey, so even though I managed to cut the bars using a wet knife as Maida suggested, I found they had generally healed up by the time I got around to transferring them to the cookie sheets. Next time I would cut a row at a time and move them before cutting more. Once on the cookie sheets the bars must sit for another four hours before baking, so this is a recipe you plan your day around :)

Here's the panel...

Suzanne: "The spices really threw me off. They taste like they should be in a pumpkin pie, but here they are in a meringue cookie with almonds and chocolate. This is a very interesting and different taste. Meringue cookies are not my favorite since they tend to be so sweet, but because they were so different I’ll rate them as a 4. Rating - 4.0"

Denny: "OK, minus one for not tasting like chocolate with all the spices. Unusual taste - not bad, just unusual. Couldn't taste the almonds either. Rating - 2.0"

Laura: "Crunchy exterior with melt-in-your-mouth chew gooey nutty insides. Yum! Rating - 4.5"

Terri: "These are outstanding! These meringue type cookies are very tasty with a wonderful assortment of spices. Just the right amount of chocolate and almonds too. As with meringue cookies, these are on the sweeter side. Rating - 5.0"

Overall rating by the panel - 3.9

Next week - Hazelnut Rusks

Nutrition Facts

Monday, October 01, 2007

Mondays with Maida - Swedish Fried Twists

Swedish Fried Twists
Page 256 in the old book / page 274 in the new book

In spite of my dislike of deep fat frying, these cookies were actually fun to make. Rolling the dough was a little difficult (perhaps I kneaded it a little too long or vigorously), but other than that the dough was easily handled. Cutting the cookies is very simple - they are just rectangles with a slot cut in them. That little twist is easy enough - just pull one end of the rectangle through the slot. Best of all, though, is watching them cook. You drop that funny looking little bit of dough into the hot oil and up rises a puffy, beautifully shaped cookie.

Now if only they tasted half so good. In spite of some mighty exotic ingredients (cognac and cardamom), these cookies are exceedingly bland. In fact in the header note Maida herself even calls them "extremely plain". Why then? Why does practically every country have a variation of this cookie to call its own? I don't get it and I'm a little bummed that I bought a bottle of cognac in order to put two tablespoons into a cookie where it wouldn't even be noticed. You know me though, I'll probably keep that bottle until the day I die (as well as that old bottle of savory), so it's bound to come in handy for something between now and then. If you don't have cognac, and are intent on making these, I'm sure you could swap in something else (orange juice, rum...) or even replace the cognac with a little extra cream.

The fact that the whole world loves these cookies makes me wonder if I did something wrong. Maybe they were cooked too long or maybe something went wrong in the frying. I monitored the temperature of the oil closely, but used a fairly small pan, which meant that I could only cook two or three at a time and so had the oil heated for a quite a while. A dusting of confectioner's sugar perks these cookies up slightly, but not enough to make a repeat appearance in my kitchen likely.

Here's the panel...

Suzanne: "As I discussed with Cathy, the taste didn’t remind me of a cookie. Actually, the taste reminded me of Chinese food. I couldn’t taste the cognac or cardamom. They were very attractive with a twist and powdered sugar on top. The cookie tasted very plain and you could definitely taste the oil from frying the cookie. Sorry, Cathy, I know you put a lot of work into this cookie, but my rating is .5. Rating - 0.5"

Denny: "OK. They looked a little like pizelle dough, so I was prepared for the anise which I don't like. I was pleasantly surprised when the anise wasn't there so that makes them better than pizelles. -1 for chocolate give them a 2.0 by my tastebuds. Rating - 2.0"

Laura: "Okay flavor, but a little too oily for my liking. Perhaps if eaten just after being made (i.e. still hot) would have been better (though I know logistically that would be impossible). Rating - 3.0"

Overall rating by the panel - 1.8

Next week - Basler Brunsli

Nutrition Facts

Monday, September 24, 2007

Mondays with Maida - French Sugar Fans

French Sugar Fans
Page 254 in the old book / page 273 in the new book

I like these cookies, but I'm not convinced they're worth the effort. Don't get me wrong - they were very good and went over well in the office, but the dough was difficult to handle. They're basically sugar cookies with two big things going for them: their looks and their lemony flavor.

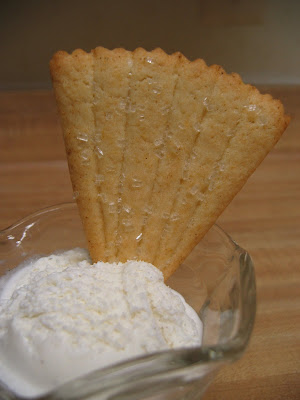
I love the idea of the fan shape, which is particularly suited to serving with ice cream. I also really enjoyed the lemon flavor (from lemon zest). Beyond that, I didn't think they were any better than my favorite sugar cookie, Maida's Plain Old-Fashioned Sugar Cookies. I think I would choose to modify that recipe slightly next time I'm looking for a lemony and/or fan-shaped sugar cookie rather than making this one again.

The fan shape is achieved by rolling a portion of the dough just large enough to cut out a circle 8 inches in diameter (I used an 8-inch cake pan as a guide). You can use a pastry cutter to get a ruffly edge, though the dough for this recipe is so soft it tends to accumulate in the little notches of the cutter. The circle is then cut into 8 wedges and radiating lines are pressed into each wedge (I used a bench scraper to do this).

The pretty little fan shape is definitely worth the trouble, I just don't think it needs to be quite so much trouble :-) Here's the panel...

Suzanne: "Delicious! Without knowing the name of the cookie, I said to a fellow staff member, “how attractive; they look like fans”. I could smell and taste the lemon flavor in the cookie and they had just the right amount of sugar on top. The cookie was delightful. Rating - 5.0"

Denny: "Surprisingly good. They are very nice-looking but I could tell they were just a sugar cookie so I was disappointed. The lemon zest changed my mind completely. With the minus 1 no chocolate penalty, I give them a 3. Rating - 3.0"

Laura: "Light, buttery, and delicious! Lovely light flavor of lemon with sugar crystals sprinkled on top. Yum! Rating - 5.0"

Terri: "Delicious and artfully beautiful! These would be the perfect cookie to serve with raspberry sorbet! Just the right amount of lemon zest (and I really like lemon in cookies). Rating - 4.0"

Overall rating by the panel - 4.3

Next week - Swedish Fried Twists

Nutrition Facts

Monday, September 17, 2007

Mondays with Maida - Connecticut Strippers

Connecticut Strippers
Page 252 in the old book / page 272 in the new book

I'd love to know why these (and last week's) cookies are attributed to the state of Connecticut, but searching on-line for information on cookies called "Connecticut Strippers" is futile at best. Clicking on a link in your search results is far more likely to take you to someplace you don't want to be than to enlighten you on the naming of these cookies. Oh well.

Anyhoo, while the Connecticut part of the name still puzzles me, the stripper part obviously comes from the way in which the cookies are made. As with last week's Connecticut Date Slices, these cookies are formed into long, flattened logs, baked and then sliced.

The cookies are flavored with cinnamon and brown sugar, and have currants and walnuts in them. I ran short of currants and so used a mixture of currants and raisins. They are also topped with a mixture of chopped walnuts, cinnamon and sugar before baking. I'd recommend that when shaping the logs you not just flatten them, but make a very slight depression down the middle. This will help keep the topping in place, which otherwise tends to bounce and roll off.

The cookies were very good, but I think I may have left them in the oven a minute or two too long - I thought they were a little on the dry side. They were still well received by all in the office, even Suzanne (!). Here's the panel...

Suzanne: "Actually, I liked the 'Strippers', even though they had raisins. I really didn’t taste the raisins and enjoyed the cinnamon, currants and nuts. This would be great with coffee. Rating - 4.5"

Denny: "Very good. Tasty and crunchy. I give them a 3.0 after -1 no chocolate penalty. Rating - 3.0"

Laura: "These are delish! Wonderful and spicy with the hint of walnuts. Nice and chewy with a sprinkling of sugar on top. Rating - 4.5"

Terri: "These 'strippers' are delicious, but not as chewy as the last cookies from Connecticut. I prefer the spicier and chewier ones from last week to these. But the currants /raisins and walnuts were delicious. Both of these types are great fall cookies with coffee, tea, or hot apple cider! Rating - 4.0"

Overall rating by the panel - 4.0

Next week - French Sugar Fans

Nutrition Facts

Monday, September 10, 2007

Mondays with Maida - Connecticut Date Slices

Connecticut Date Slices
Page 250 in the old book / page 270 in the new book

Though not the most photogenic of cookies, these date slices more than make up for their looks with a warm, spicy flavor that is complemented by sweet dates and raisins. Surprisingly, there are no nuts in these cookies, but if you just can't go without, walnuts or pecans would do nicely.

The spicing for these cookies is a little unusual. At first bite you might think the cookies have ginger in them, but instead they have cinnamon, cloves, and Maida Heatter's secret ingredient - mustard powder (this is the third cookie she's used it in). With the spices, molasses, dried fruits and sweet glaze, I thought these cookies were reminiscent of Maida's Hermit Bars.

In fact, these cookies are much like bar cookies, but instead of being baked in a cake pan, the dough is formed into long strips that are baked on cookie sheets (as for biscotti). The strips are then sliced after they've cooled. Easy, homey, and very good!

Here's the panel...

Drucie: "Spicy and moist, and best of all, no nuts! (Which makes them nice and chewy.) The sugary glaze bumps up the sweetness just enough. I like this cookie a lot! Rating - 4.5"

Denny: "Very good, but maybe a little too spicy. Kind of overwhelmed the dates. 3.0 with the minus 1 for no chocolate. Rating - 3.0"

Laura: "These have a nice ginger spice cake texture and flavor, definitely enhanced by the dates and raisins. Rating - 4.5"

Terri: "Wow - these are outstanding! Very moist and just spicy enough. These are a combination of ginger, cinnamon, and just the right amount of raisins. Absolutely wonderful with coffee or tea! Rating - 5.0"

Overall rating by the panel - 4.3

Next week - Connecticut Strippers

Nutrition Facts

Monday, September 03, 2007

Mondays with Maida - Almond Tartlets

Almond Tartlets
Page 248 in the old book / page 269 in the new book

Tartlets again, but this week they're almond. The recipe is very similar to last week's. The filling is the same but for the chocolate and flavorings and the pastry is still shortbread-like, but even richer this go-round with two whole sticks of butter and an egg. I had no problems making these, but the end-product was generally thought to be bland.

The recipe suggests a couple of variations where either candied cherries or pineapple are put under the filling and the finished tartlets are dusted with powdered sugar. I think this would make for some pretty cookies and might be appreciated by those that were bored with these sweet, but (in spite of all the almonds in them) not very almondy cookies.

I had remembered Suzanne's criticism of last week's cookies (she couldn't taste the almond) and was concerned that the fact that my almonds had been in the freezer for a number of months might have deadened their flavor. Whether or not that was the case, the freshly-purchased blanched almonds in these cookies were no more flavorful. Even though I enjoyed these tartlets, I would have to agree that the almond flavor was subdued at best. Perhaps toasted almonds or maybe even almonds with their skins on (unblanched) would convey more flavor. I think a hazelnut version of this cookie would also be nice.

Here's the panel...

Suzanne: "The Almond Tartlets were the same shape as last week’s cookies and also had the same pie-crust flaky shell. This week I could taste the sweet and crunchiness of the almonds. This was a great cookie with my morning coffee. Rating - 4.0"

Denny: "Very plain. Couldn't taste the almonds. -1 for no chocolate gives them a 1.0 in my opinion. Rating - 1.0"

Laura: "Moist and flaky tartlet crust. Almond filling is sweet but nothing terribly exciting (and I love almond flavor). Rating - 3.5"

Terri: "These are very tasty, but not quite as good as the chocolate version from last week. I'm not a chocoholic, and I do love almonds, but this tart seemed a bit bland. Rating - 3.5"

Overall rating by the panel - 3.0

Next week - Connecticut Date Slices

Nutrition Facts

Tea and cookies

Monday, August 27, 2007

Mondays with Maida - Chocolate Tartlets

Chocolate Tartlets
Page 246 in the old book / page 267 in the new book

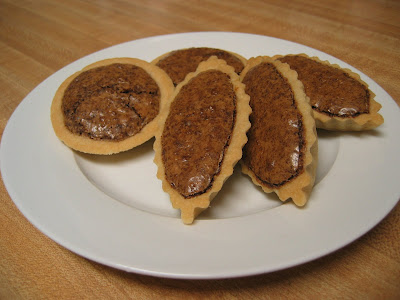
I started worrying about this chapter some time back. One reason was that the cookies looked more difficult, but another was I didn't have some of the required equipment. I started hunting around for tartlet pans and wasn't having much luck when Santos kindly volunteered that the sort of thing I was looking for was readily available in Manila and that she'd be happy to get some for me on her next visit. She was true to her word and before long I was in possession of a boat-load of beautiful little boat-shaped tartlet pans as well as some smaller but deeper round pans (like tiny brioche pans).

These Chocolate Tartlets require half-inch-deep pans so I put those pretty little bateaux to good use and also used the plain round pans that I'd gotten for the Fudge Délices. The recipe actually calls for smaller pans, but I found these worked very well with no change in the timing needed. My pans were about twice the size of those called for, and I got 35 good-sized tartlets with a little pastry dough leftover.

One nice thing about using larger pans is that it takes less time to make a batch of these :) Mixing the pastry dough and filling is very simple. Pressing the dough into the pans isn't difficult, but it is a little tedious and does take time. The only tricky part when making these tartlets is removing them from the pans. Don't worry though, they don't stick and if you're reasonably careful they'll come out perfectly. Maida describes the process like this: "...invert each mold into the palm of your hand and, with a fingernail of the other hand, gently release and remove the mold." The trick here is to use your fingernail to pry the pan away from the cookie, not the other way around. If you try to pull at the cookie with your fingernail, you'll just break away a piece of the crust. While prying the pan with your fingernail, use your thumb and forefinger on the other hand to sort of gently encourage the tartlet out of the mold. Once you get one, you'll know exactly how to do it.

Denny's out this week - wouldn't you know it'd be a chocolate cookie he missed. Here's the panel...

Suzanne: "This was an unusual cookie since it was like a chewy chocolate brownie in a tart shell. I just found out that there were ground almonds in the brownie. The ground almonds were so fine that I couldn’t taste them and I kept thinking the whole time I was eating the tart that chopped almonds would have been an added treat. Rating - 4.0"

Laura: "Yum! This is a moist tasty brownie in a flaky tart shell. Moist and delicious. Fab! Rating - 4.5"

Terri: "These are outstanding! The chocolate filling with ground almonds is delicious and the pie crust-like shell is perfect. the only addition might be some whipped cream for the top! Rating - 5.0"

Overall rating by the panel - 4.5

Next week - Almond Tartlets

Nutrition Facts

Wednesday, August 22, 2007

Sewing - Project Christina


Back in April, knowing my nine-year-old niece's passion for Project Runway and her desire to be a fashion designer when she grows up, and being at a loss as to what to give her for her birthday, I wrote a little "press release" and tucked it in a box with some tissue paper, the logo above, a couple of photos of Tim Gunn and wrapped it up. Christina's reactions to gifts I've given her in the past have always been quite subdued (Chuck will tell you this runs in our family :) ), so I was really tickled when this gift was met with such obvious glee - she was literally bouncing up and down on the sofa while her mom read the press release aloud.

FOR IMMEDIATE RELEASE
April 15, 2007

Project Runway Spin-off Announced

NEW YORK – The producers of Project Runway today announced Project Christina, starring Christina ___. Christina, who recently celebrated her ninth birthday, is an aspiring fashion designer. With locations in ___, ___, and ___, Maryland, Project Christina will trace Christina’s progress as she brings one of her designs to life.

The first episode will set the stage for the entire project as Christina sketches her design. In later episodes, her assistant, Cathy ___, will take Christina’s measurements and modify a basic pattern so as to approximate the design Christina envisions. After a trial run in muslin, Christina and Cathy will go to ___ Fabrics where Christina will select her fabrics and notions from among the vast array on offer there. While she will have an unlimited amount of time to make her choices, she will be restricted to a $40 budget. After her purchases are made, Christina will attend a celebratory luncheon in her honor at a restaurant of her choice.

Christina will later spend time in Cathy’s sewing room overseeing the construction of her garment. During this time, she will ensure that the garment is true to her design and that it fits properly. She will also participate as much as she is able and/or wishes in the actual sewing of the garment.

As one might expect, the series will conclude with a walk down the runway, as Christina models her completed design for her adoring fans in her very own home.


Christina sent me her design a few weeks ago and we set the date for this weekend. In between I worked on the pattern (I started with Butterick 4220 and made some major alterations) and did a couple of trial runs in muslin. Christina and I went shopping Sunday, had a nice lunch out, and then got to work. We were up early Monday and finished about midday. Christina helped every step of the way and in spite of the fact that she was a little nervous initially about using the sewing machine, she took to it like a fish to water. She really was eager to be involved as much as she could be and I was impressed with how well she remembered instructions I gave her and how carefully she did things.

This was a learning experience for me as well, since this was the first time I've ever made more than minor adjustments to a pattern. My pattern wasn't perfect - notches didn't line up exactly as they should, etc. - but it worked well enough. Much like cooking, with clothing construction I've always been one to follow directions. This experience has whet my appetite for striking out on my own on occasion.

If you sew (or cook, or knit, or crochet, or weave, or whatever), pass it on to someone! It'll make their day and it'll really make yours :)


Monday, August 20, 2007

Mondays with Maida - Chocolate Meringue Ladyfingers

Fudge Délices
Page 244 in the old book / page 266 in the new book

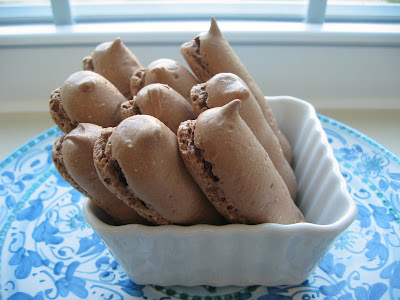
These ladyfingers are simply chocolate meringues piped out with a plain round tip. Perhaps someone more skilled at piping could make them look beautiful, but in my case you couldn't help but compare the outcome to p__p. In fact, a lady at work got such a chuckle out of it that she brought one home for her seven year old nephew. Anyway, for a more presentable shape, I'd be tempted to try a star tube next time. You could still pipe them into three-inch sticks, or just make round blobs.

The taste was quite good - the chocolate flavor came through and they're very crunchy, sweet, and light as air. As you might expect with a meringue, they're hollow inside with a hint of chewiness in the middle.

To make them you make an italian meringue, stir in a mixture of cocoa and confectioner's sugar, pipe onto cookie sheets and then bake at a fairly low temperature. Couldn't be easier, and they're fat-free too!

Here's the panel...

Suzanne: "Ladyfingers are always very attractive cookies, but meringue cookies are not my favorite type of cookie. I feel like I’m eating pure sugar and I don’t care for the texture of the cookie. Rating - 2.0

Denny: "Unusual, but very good. liked the feel of this one, light and crunchy. Chocolaty too, but very crumbly. Minus one for crumbliness gives them a 4.0 in my eyes. Rating - 4.0"

Laura: "Yummy cookies! (But I wouldn't suggest making them as ladyfingers). Rating - 4.5"

Terri: "Wow - these are delicious. I really like the chewiness when you bite into this cookie. The meringue makes them very light and this would be a grat choice with some summer fruits. Rating - 4.0"

Overall rating by the panel - 3.6

Next week - Chocolate Tartlets

Nutrition Facts

Monday, August 13, 2007

Mondays with Maida - Fudge Délices

Fudge Délices
Page 242 in the old book / page 264 in the new book

These little chocolate tarts were delicious and should have been relatively simple to make. I made an unfortunate decision a few weeks back when I ordered the little tartlet pans - I only bought 12. The recipe makes 23 (more on that later) and I really should have purchased two dozen of the pans.

Another problem I had was that a goof I made while preparing the filling caused the chocolate to seize. Even as I was adding the milk, butter and vanilla to the melted chocolate I was thinking, "this is interesting, seems like these liquids would make the chocolate seize." Well, I was right about that but I was remembering the instructions incorrectly - I should have been adding the sugar at the same time. Instead, I added it after the chocolate seized. It seemed to recover fairly well, but I wouldn't be surprised if that was the root of my later troubles - while baking, the butter bubbled up in the filling leaving the surface sort of pock-marked. The tartlet you see above is one of very few that weren't scarred in that way.

I also think that my tartlets were over-filled. Maida was emphatic that 23 was number to make to ensure that the filling was the proper thickness, but nearly all mine lacked a clean edge of pastry because the filling rose up over it. My pans were slightly bigger than those called for (2 3/8" rather than 2 1/4") but I used a 2 3/4" cookie cutter for the pastry as specified in the recipe. There was plenty of pastry leftover, so next time I'd make 24.

After all my difficulties, I assumed the cookies were going to be a disaster and was resigned to making a second batch. But after sampling one, I decided to go ahead and bring in my flawed but tasty cookies. Top Chef I am not :)

Here's the panel...

Suzanne: "Delicious! The inside of the tart cookie shell tastes like a chocolate fudge brownie with a pecan on top. They were also very attractive. The rating is definitely at 5 and if I could I’d rate then even higher. Rating - 5.0

Denny: "Excellent 5.0. Only problem was there weren't enough of them. Not too crunchy or sweet, just right. Did not look as great as they were! Rating - 5.0"

Laura: "Nice flaky tart shell with moist and delicious brownie-like filling. Rating - 4.5"

Terri: "These cookies are outstanding and a must for chocolate lovers! I really liked the crust or shell in which the fudge was held. Almost like a mini fudge pie. Rating - 5.0"

Overall rating by the panel - 4.9

Next week - Chocolate Meringue Ladyfingers

Nutrition Facts