Showing posts with label shf. Show all posts

Sunday, June 25, 2006

IMBB 27 + SHF 20 = The Joy of Soy!


Can it be? Are we really up to IMBB 27? And SHF - didn't that start a couple of months ago? SHF 20??? I knew I had skipped a few of these events, but am horrified to find I've missed ten of each. This month Reid - the nicest guy in Hawaii - is hosting both events concurrently. There is no way I'm missing this one!

And if the fact that Reid is hosting this double-header weren't reason enough to participate, the theme this month is soy. Though I know little about soy and seldom cook with it, I've always been fascinated by its infinite incarnations - soy milk, soy flour, tofu, tempeh, TVP, "soysage", soy cheese, soy bacon, etc. Soy can do it all.

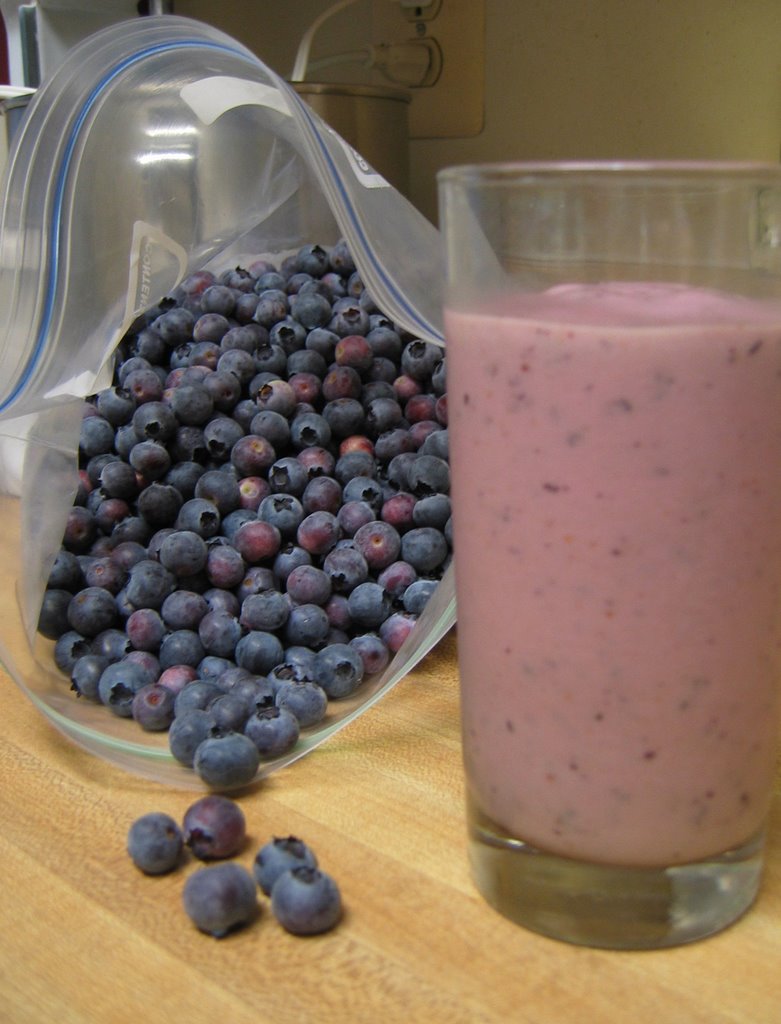
I didn't go too far from my comfort zone for this occasion (tempeh wouldn't really fit in with the SHF theme, now would it?). It's that time of year when I'm (happily) inundated with blueberries, so I took my favorite blueberry muffin recipe and swapped in some soy flour and changed up my new favorite smoothie recipe by using soy yogurt. Both are delicious and together make for a nutritious breakfast with lots of protein, fiber, and nature's sweetest little brain food morsels - blueberries!


Blueberry Muffins
adapted from "Maida Heatter's New Book of Great Desserts"

1 cup fresh blueberries
1/2 cup all-purpose flour
1/2 cup whole wheat flour
1/2 cup soy flour
2 tsps baking powder
1/2 tsp salt
1/2 cup sugar
1 egg
2 Tbs vegetable oil
1/2 cup skim milk
finely grated rind from one orange

Preheat oven to 375 F and grease muffin pan or line with paper cups.

Stir together the dry ingredients in a large bowl, then stir in the blueberries. In a small bowl, beat the egg lightly then mix in the oil, orange rind, and milk. Add the wet ingredients to the dry ingredients and stir with a spatula until just mixed. Spoon into muffin cups. Sprinkle tops of muffins with a generous amount of sugar. Bake for 20 to 25 minutes. Makes 10 muffins.

Note: Reid reminded me that one of the benefits of soy is that those that are lactose intolerant (which I think is, believe it or not, most of the adults on this planet) can use it to replace milk products. I have substituted orange juice for the milk in this recipe before and I'm sure substituting soy milk would work equally well.

A few tips about substituting soy flour: baked goods made with soy flour will brown more quickly than those without, so you may need to lower the oven temperature and/or reduce the cooking time. Because it has no gluten, you cannot replace all the flour in a recipe with soy flour and expect similar results. You can swap in soy flour for a quarter to one third of the flour. Soy flour can also be used as an egg replacer (one tablespoon soy flour + one tablespoon water = 1 egg). Interestingly, baked goods made with soy flour keep better.


Banana Blueberry Smoothie made with Soy Yogurt

I happened upon this recipe while watching an episode of Everyday Food a few weeks ago. It looked so good and sounded so easy, AND I had everything I needed to make it. The next morning I tried it and was hooked. I've since made it with strawberries (I put some fresh ones in the freezer the night before) and now with soy yogurt. It is so good - rich and creamy and surprisingly sweet, given that it has no added sugar. If you've got some flavorful blueberries, you can throw in your ugliest old banana and it will still be amazing. I've also made this without freezing the berries, and while it's not quite as thick and certainly not as frosty, it's still mighty good.


Looking back over this post, I see now it looks more like the Joy of Blueberries than the Joy of Soy, but I really did enjoy my soy - honest! Thanks to Reid for hosting this round of IMBB and SHF. Watch for his round-up later in the week over on 'Ono Kine Grindz. I'm sure it's going to be fantastic!

Technorati tags:

Friday, July 15, 2005

SHF 10 - Oh, Honey!


If there was an award for the sweetest little meme, it would no doubt go to Sugar High Friday, created by Jennifer and hosted this time around by Nic. The theme for this tenth edition of SHF is honey.

I seem to go through honey really quickly these days, so I generally buy two or three pound containers of the grocery store variety. I actually have no complaints about this most ordinary of honeys and am quite fond of its flavor, but today I was shopping in a high end grocery store and was seriously tempted by some pricier varieties ... raspberry flower, sage, Tupelo, etc. I haven't succumbed yet, but when I do, I can't think of a better way to use it (except perhaps on some toast) than as the sweetener and flavor base for some ice cream.

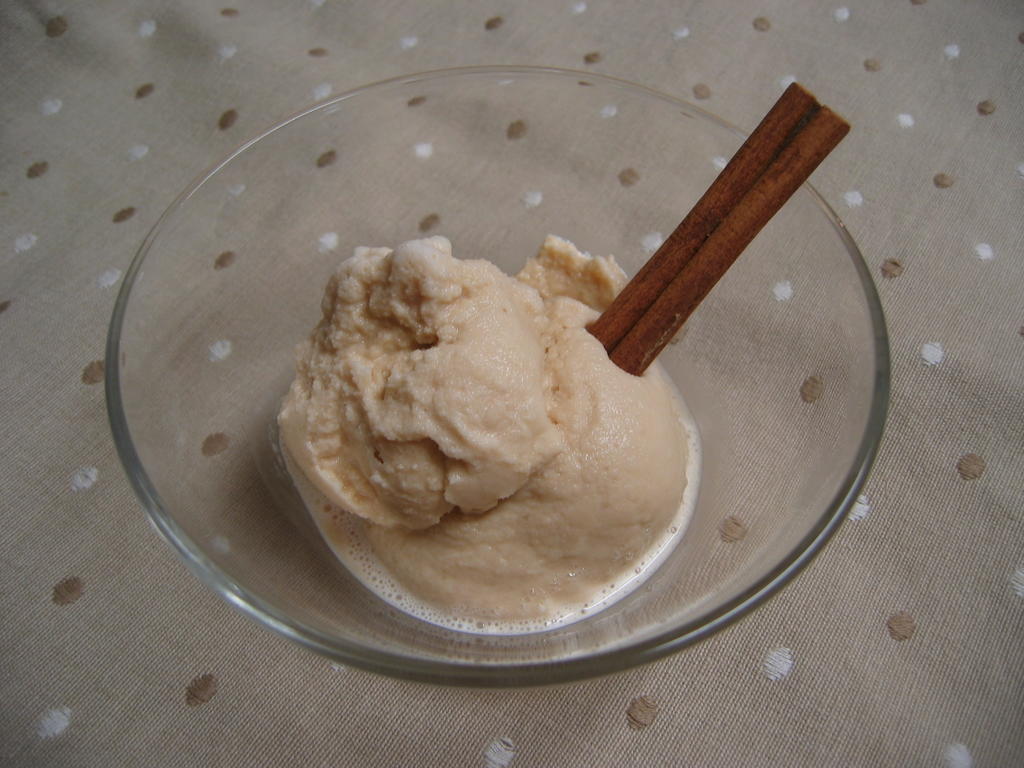
I normally put the name of my recipe in the title of my SHF and IMBB posts, but I can't decide what to call this. My original concept was an ice cream based on Chai. Because I was using mostly milk and very little water, I was a little timid about raising the temperature too high and the flavors from the spices and tea were not fully extracted. The spiciness is hardly noticeable over the strong honey flavor, but I was still very happy with the outcome.

I'd like to experiment with this some... the first way would be to try some things to bring out the spiciness more. I could increase the spices, leave them to steep overnight, include them with the water and ginger at the beginning, or I could replace half the honey with either sugar or some other milder liquid sweetener - like Lyle's Golden Syrup. I really liked the texture of this ice cream and wonder if the honey contributed to that in any way. It never froze hard and it didn't develop a grainy texture. It was really refreshing - not especially creamy, almost watery as it melts in your mouth - but not at all icy.

Another way to go with it would be to leave out most of the spices and try some of those varietal honeys. So many possibilities!


Chai or Honey Ice Cream - you decide!

This is exactly as I made it. It was delicious, not very spicy, with a strong honey flavor.

1/2 cup water
3 quarter-inch slices of ginger
1/2 cup half and half
1 cup whole milk
1/2 cup honey
3 cardamom pods cracked open
1/2 cinnamon stick
4 cloves
5 peppercorns
2 tea bags

Place the water and ginger slices in a saucepan and bring water to a boil. Simmer for 5 minutes. Add the half and half, milk, honey, and spices. Heat the mixture over medium heat, stirring often (actually, I stirred constantly - not sure if that's necessary or not). You want to get the mixture hot, but don't want it too hot or a skin will form as it cools. Using Alton Brown's Vanilla Ice Cream recipe as a guide, I decided to bring the temperature to 170 F. At that point, remove the pan from the heat, add the tea bags and allow the mixture to steep for 5 minutes. Strain and refrigerate overnight. Freeze in an ice cream maker according to the manufacturer's directions and then harden for an hour or two in the freezer before eating. Enjoy!

Friday, May 20, 2005

Sugar High Friday - Baked Ricotta Puddings with Lemon Syrup


I'm still scurrying to catch up with things at work and home since my return from vacation, so though I do remember seeing the SHF announcement some time earlier, it wasn't until today I realized - it's today! But with such a great theme (citrus) and Alice hosting it, I just had to participate.

I knew I would make something lemon - I just made one cookie recipe and will be making another in a couple of days and each uses the zest of two lemons. That means I've got some lemon juice to use up! I had recently noticed Lyn's recipe for ricotta cheese on her blog, Lex Culinaria, and was curious to try it. Lemon and ricotta seemed like a good match, so I googled around until I found this recipe for Baked Ricotta Puddings with Lemon Syrup. Perfect!

Making the ricotta was easy, though it took me over an hour to bring the milk to the proper temperature. I was also ill-equipped to remove the curds from the pot. I didn't have a large slotted spoon and tried to make due with a small strainer (which got clogged by the cheese) and a small slotted spoon (slow going). In the end though all worked out and the cheese was wonderful. It smelled and tasted fresh and rich. I used all but a spoonful of it in these puddings, so I'd love to make it again and try it in lasagna or something similar.

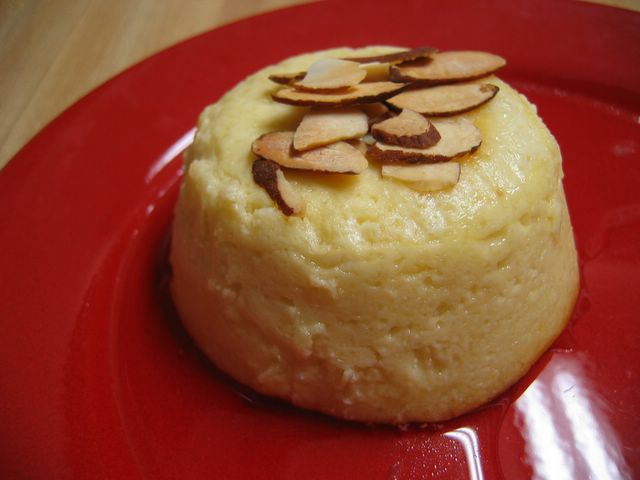
The pudding went together easily. The recipe has a typo that makes it a little confusing - just above the list of ingredients it says "Serves: 4", but in the instructions it says to prepare 6 ramekins. Based on the size of the ramekins (150 ml), it appears that the correct number of servings is 6. I used regular granulated sugar in both the puddings and the lemon syrup and I used 3 large eggs in the puddings since my grocery store had no medium eggs. I boiled the syrup 5 minutes, but maybe I should have boiled it longer. Once I added the lemon juice, the syrup was very thin. It does not resemble the syrup shown in the photo that accompanies the recipe at all. I expect the difference in color is due to the fact that I used regular white sugar, but the syrup in that photo is also very thick.

Even if my syrup is thin, it is sweet and very lemony and a perfect accompaniment to the puddings. I ate one warm and really enjoyed it. The recipe says that they can also be served chilled. I imagine this recipe would also be good with other citrus juices substituted for the lemon.

Friday, April 22, 2005

Sugar High Friday - Indian Pudding


Ahhh... Indian Pudding. I love the smell of it baking, its homey taste, its warmth. It is comfort food of the highest order. Why, oh why have I waited all these years to make some for myself?

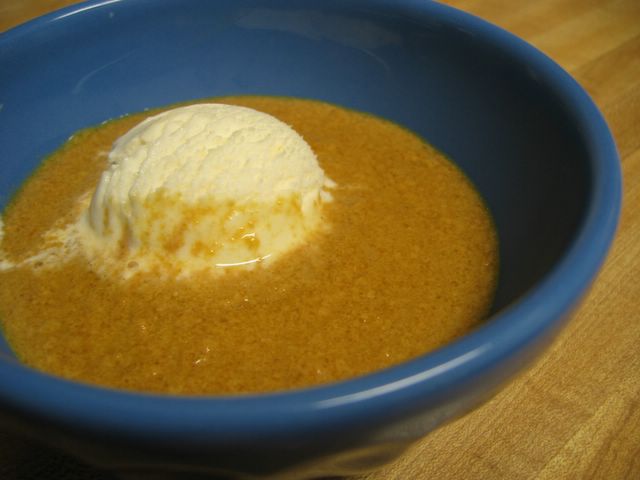
Indian Pudding, like baked beans, made frequent appearances at the dinner table of my childhood. I have always loved it, though I don't think it is quite so fondly remembered by my siblings. When I mentioned to my brother Bob that I would be making it for the upcoming Sugar High Friday (which, by the way, has a theme of Molasses this time around and is hosted by Derrick of An Obsession with Food) and said that I thought I remembered that I was the only kid in our family that liked it, he remarked, "I remember that I liked the vanilla ice cream on top."

I couldn't find any definitive history of Indian Pudding, but it does seem to be generally accepted that it came to the early New England settlers by way of the native Americans. I learned from this article in Native Peoples Magazine that the Algonquian and Iroquoian tribes traditionally ate their main meal in the morning and that it often included a savory or sweet corn meal porridge. It sounds as though molasses may have been a later addition.

If you're not inclined to make your own Indian Pudding, your best bet might be to try some at Durgin Park next time you're in Boston. I've never eaten there, but I remember my parents speaking of it fondly. Believe it or not, you can also buy Indian Pudding in a can!

My recipe for Indian Pudding was given to my Mom by Auntie Bee. It is simpler and plainer than others I've seen. It has no butter, eggs, or raisins. I made it with skim milk which resulted in a rather thin, but still very tasty, porridge. I believe my mom always made it with whole milk. This keeps well in the refrigerator for a few days and can be reheated in the microwave.

Baked Indian Pudding

1 quart milk
1/3 cup corn meal
1/2 cup molasses
1/4 tsp ginger
a pinch of salt

Mix all ingredients together and pour into a greased baking dish. Cook in a slow oven (275 F) for 2 hours. Stir pudding 3 or 4 times while cooking or until it is well blended. (My note: stir fairly often in the beginning to avoid lumps.)

Friday, March 18, 2005

SHF 6 – A Tale of Two Puddings


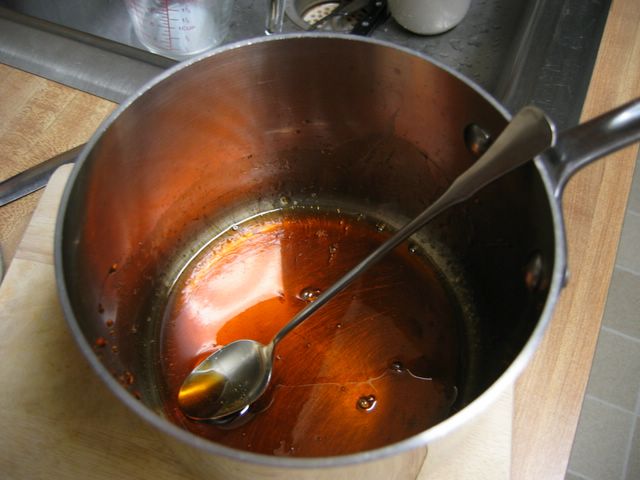
It’s Sugar High Friday once again. This time it is hosted by Debbie of words to eat by and the theme is Stuck on You (Caramel). Up until today I had never caramelized sugar. It was one of those things I was sort of afraid to do. If nothing else, at least I have cleared that hurdle.

I somehow got in my head I wanted to make caramel pudding. I was googling about and came across an old Fanny Farmer recipe for Caramel Junket. I’d heard of Junket before but wasn’t really sure what it was. While the term is commonly used to refer to the dessert itself, it is actually the brand name of the rennet tablets used to create the desserts. According to the maker of the tablets, desserts made by adding rennet tablets to milk are more properly called rennet-custards.


I managed to find Junket tablets at Whole Foods, so I gave the Caramel Junket (or should I say Caramel Rennet-Custard?) a try. Melting the sugar to make the caramel was easy enough, though I had some trouble when I added the boiling water. The caramel seized and I ended up with a couple of chunks that never did dissolve back into the syrup. Warmed milk, the crushed junket tablet, a little salt and vanilla are then added to the caramel syrup. The junket must be left in a warm place until it sets and then it is chilled.


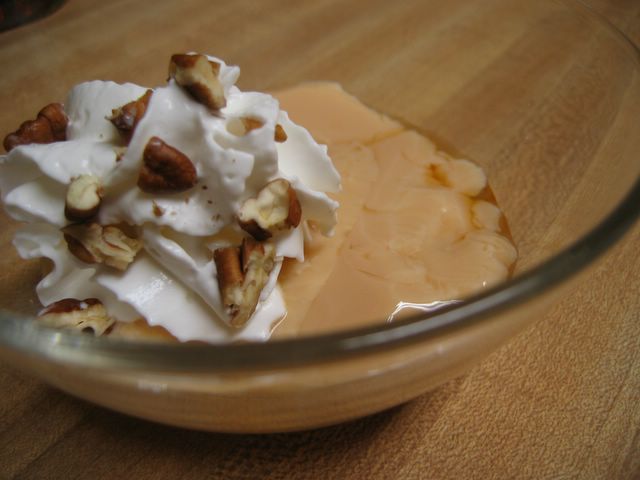
It’s possible that I rushed the process – I was in a hurry to have a taste and get my photos. Or maybe using skim milk was not a good idea. In any case, I’m pretty sure something went wrong. My guess is that junket doesn’t have a firm set. It also doesn’t feel thick and creamy in your mouth. But I don’t think it should have been separating as badly as it was after I spooned some out of the dish. The caramel flavor was barely noticeable and I found the thin, jiggly texture totally unappealing.


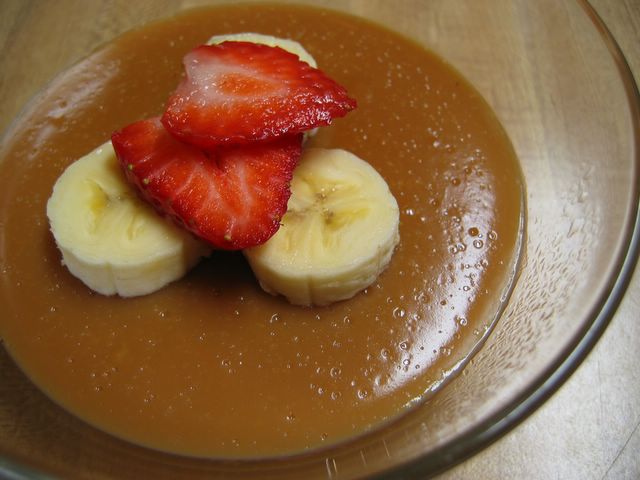
So, back to the drawing board. I decided to combine the junket recipe with my favorite chocolate pudding recipe (a recipe that Debbie is also a fan of) to create my own caramel pudding. I followed the same procedure for making the caramel and had better luck this time around with getting the caramel completely dissolved after adding the boiling water. While the end result was much better than the junket, the caramel flavor was still a little weak. One thing I forgot to do that might help is to add a pinch of salt. I’ve included that in the recipe below. I was pleased to find out that the Moosewood chocolate pudding recipe from which my recipe is derived is very resilient and can probably tolerate quite a bit of fiddling. I’m thinking butterscotch, then maybe lemon …

Caramel Pudding

1/3 cup granulated sugar
1/3 cup boiling water
2 cups skim milk, warmed
3 tbs cornstarch
a pinch of salt
1 tsp vanilla

Put the sugar in a heavy pan over medium-high heat and caramelize the sugar. Add boiling water (careful – it will bubble and steam ferociously when you first add it) and continue cooking until reduced to 1/3 cup. The caramel will seize when you add the water, but keep stirring and it should dissolve back into the syrup. Remove from heat and cool slightly. Add a ladleful of the warmed milk and stir, then add the rest of the milk, the cornstarch and the salt. Put the pudding back over medium heat and cook, stirring continuously, until it starts to simmer. Reduce the heat and continue cooking and stirring for another three or four minutes. Remove from the heat and stir in the vanilla. Pour into serving dish(es) and chill.

Friday, January 07, 2005

SHF 4 – Pistachio Gelato


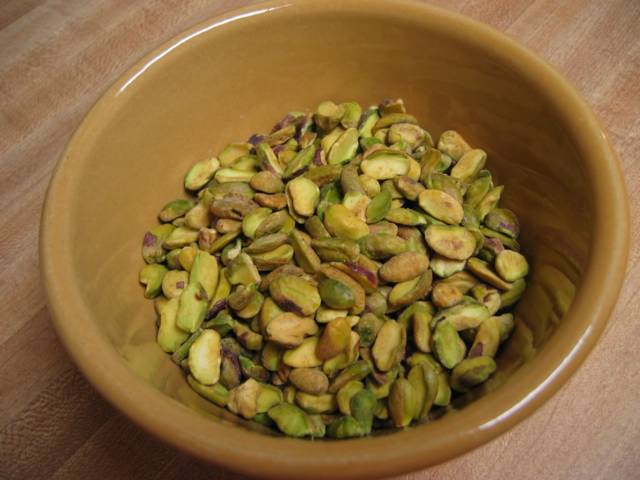
Pistachios are fairly new to me. My first pistachio purchase was a mere two months ago when I bought a one pound bag of shelled pistachios in order to make Holiday Biscotti for IMBB 10. While I enjoyed the biscotti, I was frustrated that I couldn’t discern a distinctive pistachio flavor.

I mentioned to a friend that I was at a loss to describe or even recognize what pistachios taste like and asked her how she would describe the taste. She said when she thought of pistachios she thought of pistachio ice cream (which she thought had sort of a minty flavor), but she had her doubts as to whether that was truly pistachio. This conversation took place just days before I began looking for something to make for Sugar High Friday #4.

Sugar High Friday is the creation of Jennifer at The Domestic Goddess. It is a blogging event in which participants prepare something sweet which incorporates the theme ingredient and share the results by posting to their blog on the designated day. This time around it is hosted by Viv of Seattle Bon Vivant and the theme is nuts.

It didn’t occur to me at first to make something with pistachios. Since I am hosting a birthday party tomorrow, I spent quite a bit of time hunting for a cake recipe that featured nuts, would be suitable as a birthday cake, and would appeal to both adults and small children, but I came up empty. (Actually – I later found a recipe in The Wooden Spoon Dessert Book for a Toasted-Butter-Pecan Cake that sounds awesome. I'll be making it tonight and serving it tomorrow - so I'll have to tell you about that another time.)

After I widened my search to include anything made with nuts, I came upon a recipe for Pistachio Gelato at Leite’s Culinaria. Perfect! It appealed to me because it would be simple to make, I had pistachios to use up, and best of all – I might finally figure out what pistachios taste like.


The gelato base consists of whole milk and sugar. These are heated together and then ground pistachios are added and the mixture is allowed to steep overnight in the refrigerator. Just before freezing the gelato, you strain out the ground pistachios (though some fine bits find their way in, giving the finished gelato a nice texture). After fifteen to twenty minutes in the ice cream maker and an hour in the freezer to firm it up, you’ve got yourself some mighty fine gelato!

I suppose you might be wondering – does she know what pistachios taste like yet? Well, I’m not sure I can put it into words, but I think yes. I think the next time I taste it I’ll know it, and I’ll be thinking … mmmmm, pistachio!

Friday, December 10, 2004

SHF3 – Auntie Bee’s Cardamom Apricot Muffins


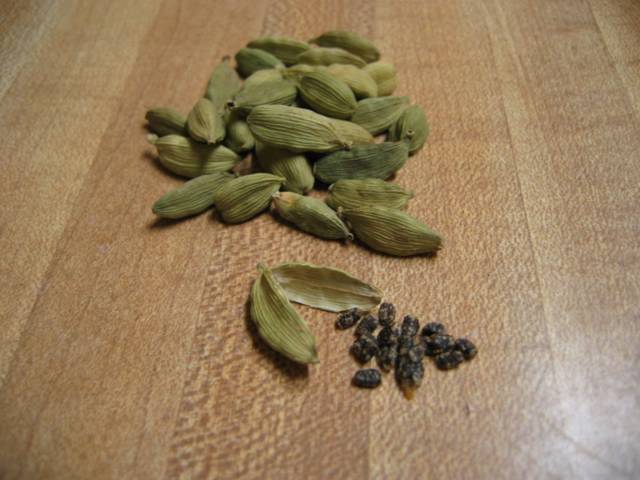
Sugar High Friday has rolled around again. Hosted by Zarah Maria of Food & Thoughts, the theme is “Spice Up Your Winter!” Participants were asked to include cardamom, nutmeg and/or allspice in their sweet creations.

I didn’t have to think about this very long before deciding that I would focus on cardamom. My great aunt, Auntie Bee, who passed away many years ago but still is very fondly remembered by my entire family, once told me that cardamom was her favorite spice. I don’t remember that she told me why, but I believe that she had a fascination with all things Swedish (probably because Uncle Ted’s family was Swedish) . This fascination apparently included Swedish cooking, because one of the cookbooks I inherited from her is titled “Good Food from Sweden”. Cardamom is commonly used in Scandanavian baked goods.

I looked through Auntie Bee's Swedish cookbook for recipes using cardamom. I found a couple that were possibilities, but the instructions all started with “Wash and dry butter.” I had no idea what that meant, although I’ve since found some instructions on-line for washing butter , and I suspect it is not necessary with the butter we purchase today.


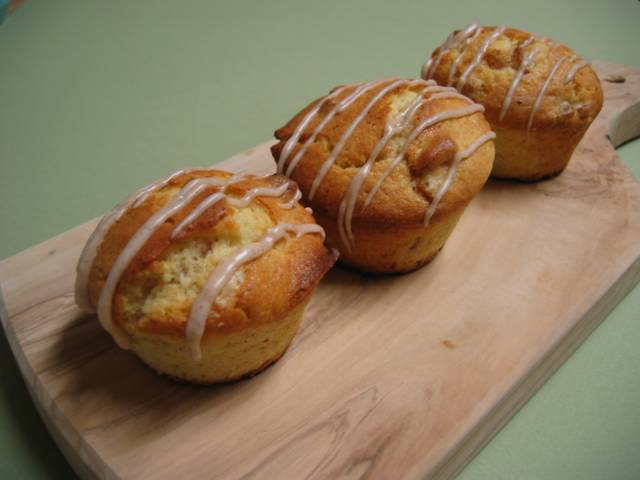
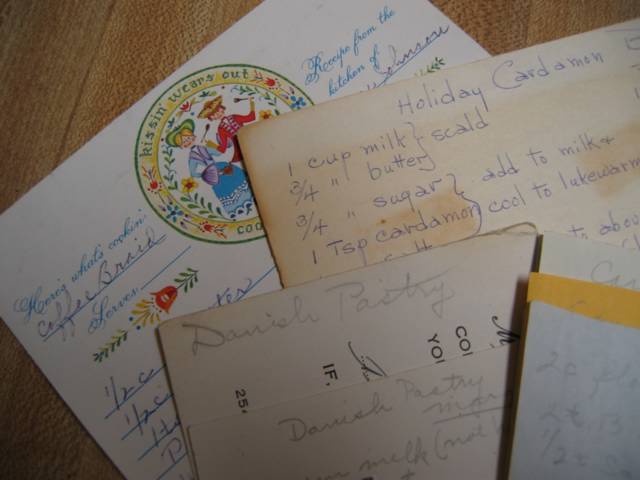
Having ruled out the recipes from the Swedish cookbook, I was briefly at a loss as to where to turn next but then remembered that I have Auntie Bee’s recipe boxes! I looked through her recipes for cookies, cakes and breads and came up with several recipes using cardamom. There were recipes for a Coffee Braid, Holiday Cardamom Bread, Margo’s Danish Pastry, and Cardamom Fruit Muffins. I’d eventually like to try the other recipes, but for this occasion I went with the easy one – Cardamom Fruit Muffins. It is actually a variation of a recipe called “Rich & Sweet Muffins” that calls for the addition of ground cardamom and candied fruit. I swapped dried apricots for the candied fruit, cut the recipe in half, and added a cinnamon icing (an idea I got from the coffee braid recipe). The muffins were really wonderful. I don’t think I’ve ever made muffins with butter before. My usual recipe for blueberry muffins calls for melted butter, but I’ve always substituted vegetable oil. What a difference the butter makes! The crust is tender and crunchy-crumbly and the muffins live up to their name – they are rich and sweet!

Auntie Bee’s Cardamom Apricot Muffins

makes 6 – can be doubled

1 cup flour
1 tsp baking powder
¼ tsp salt
1/8 tsp ground cardamom
¼ cup softened butter
¼ cup sugar
1 egg
¼ cup milk
¼ cup chopped, dried apricots

Preheat oven to 375 F. Butter a 6 cup muffin tin. Sift together flour, baking powder, salt, and cardamom and set aside. Cream the butter with the sugar and then beat in the egg. On low speed add half the flour mixture, then the milk, and then the rest of the flour mixture. Add the apricots. Spoon batter into muffin tin and bake for 20 to 25 minutes. Allow to cool a little, then drizzle with cinnamon icing (strained confectioner’s sugar and a bit of cinnamon mixed with a little milk or cream). I used a sandwich bag with a corner clipped off to drizzle the icing.


Friday, November 12, 2004

Sugar High Friday – Try, try again…


Much as I love to make cookies, I’ve never had enough of a grasp of the science of baking to feel comfortable tinkering with a recipe. When it comes to cookies, I follow instructions. But for Sugar High Friday (SHF), as with Is My Blog Burning (IMBB), my goal is to create something that is my own (if for no other reason than so I can include the recipe in my post). Given that I failed to do so for the last SHF, the pressure was on for SHF2. The theme this time is Apples and the event is hosted again by it's founder, Jennifer of The Domestic Goddess.

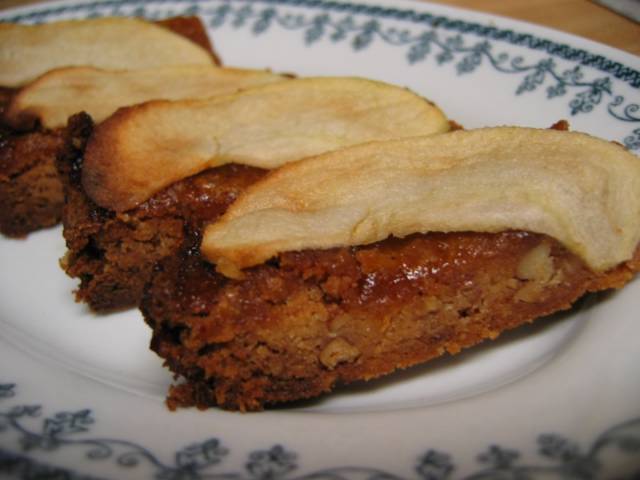
As readers of my blog know, I’ve just started a long term cookie project. I’m planning (hoping) to make every cookie in Maida Heatter’s Book of Great Cookies, so of course it was one of her cookies that popped into my head when I was trying to come up with an idea. Her Cinnamon Almond Cookies are delicious – they have a cinnamon shortbread base covered with sliced almonds and topped with a lemon glaze. There’s a lot of cinnamon in the dough, enough to color the dough brown, but more importantly enough to give the cookies a distinctive cinnamon flavor. My idea was to take this base, add some pecans to the dough and then top the cookies with apple slices. The problems I anticipated were getting the apples and cookie base done at the same time, dealing with the moisture released by the apples, and making the apples stick to the cookies.

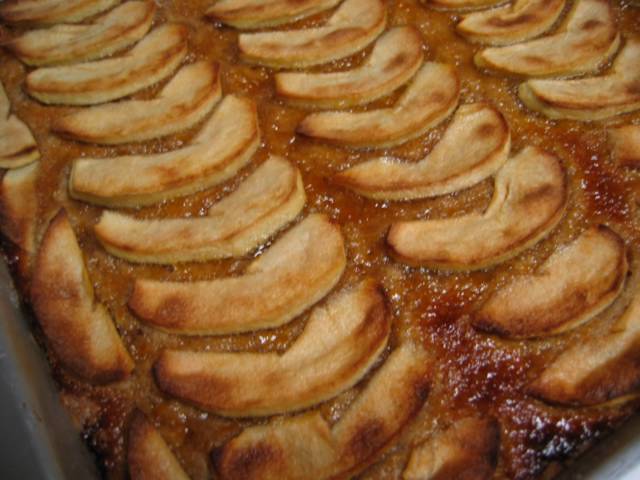
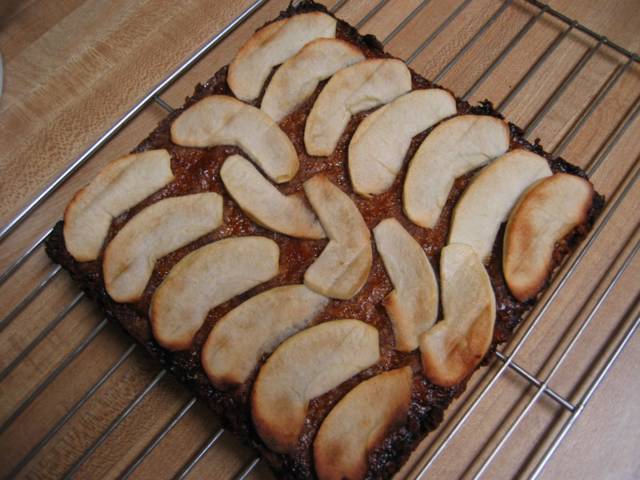
The last problem turned out to be relatively simple compared to the other two. I looked at apple tart recipes in my cookbooks and on-line and decided that apricot jam would be the perfect “glue” for this project. What I didn’t consider was that this would probably also contribute to the moisture problem. In my first attempt, I didn’t really address the moisture problem – I just hoped if I cooked the cookies a little longer and a little hotter there wouldn’t be a problem. I was wrong. Here’s the recipe from my first attempt…


Apple Tart Bars – Take One
(I don’t recommend you try this without making some adjustments)

2 sticks unsalted butter
1 cup sugar
2 tsp cinnamon
1 egg yolk
1 tsp vanilla
2 cups flour
1 cup finely chopped pecans
1/3 – ½ cup apricot jam
2 Granny Smith apples
1 tbs butter, melted
extra sugar to sprinkle on top

Preheat oven to 325 F. Butter a 10 ½ by 15 inch pan and line with parchment. Cream butter, add sugar and cinnamon and blend well. Add egg yolk and vanilla and blend. Gradually add flour at low speed and mix until incorporated. Add pecans. Press dough into pan and flatten (put wax paper on top and use a straight sided glass to smooth dough into an even layer). Warm the apricot jam in the microwave and stir to loosen it. Spread over the dough with a rubber spatula. Arrange thin slices of apple in a single layer over the dough. Brush melted butter over the apples and sprinkle with sugar. Bake for 40 minutes, raise temperature to 350 F and bake for 15 minutes more or until apples are nicely browned.

If you follow the instructions above, what you remove from the oven will look lovely and smell heavenly, but it won’t be a cookie. Actually, it tastes pretty good, but the texture is soft and wet. It might be good hot with some vanilla ice cream.

I decided to try again but this time I would bake the dough first, then add the jam and apples and bake some more. My concern with this method was that the cookie might overcook by the time the apples were well cooked. For my second attempt, I decided to cut the recipe in half.


Apple Tart Bars – Take Two
(this works, though it still needs some timing and/or temperature adjustments)

1 stick unsalted butter
½ cup sugar
1 tsp cinnamon
about ½ egg yolk (I probably used a little more)
½ tsp vanilla
1 cup flour
¼ cup apricot jam
1 Granny Smith apple
2 tsp butter, melted
extra sugar to sprinkle on top

Preheat oven to 350 F. Butter an 8 inch square pan and line with parchment. Follow instructions above to mix dough and spread in pan, but do not add jam or apples yet. Bake for 30 minutes. Remove and spread with warm apricot jam. Arrange apples over jam, brush with melted butter, and sprinkle with sugar. Bake until apples are browned, about 40 minutes. (With this temperature and timing the cookies were overdone – probably should start with 300 F, which is the temperature in the original recipe, and raise the temperature to 350 after the apples are added.)

I have one more idea about how to make this work. Bake the cookie without the jam and apples for 45 minutes at 300 F. Cool, cut into bars and store. Bake the apple slices separately until nicely browned. To serve, spread some apricot jam on the cookie and top with an apple slice. I haven’t tried this and I’m not sure it would be quite as satisfying as having the apple baked into the cookie, but it might be the only way to get the cookie and the apple done just right.

I came home this evening and considered making one last try, but opted instead for the perfect apple dessert… a Pink Lady apple all by itself. Oh so easy, but oh so good!


Friday, October 01, 2004

Sugar High Friday #1 - Chocolate Bread Pudding with White Chocolate Sherbet


Jennifer at Domestic Goddess has proposed yet another communal cooking and blogging event – Sugar High Fridays: the International Sweet-Tooth Blogging Extravaganza or SHF:ISTBE for short (actually, either one is a mouthful!) Mmm…sweets…sign me up!

The theme for this first Sugar High Friday is white chocolate. I have nibbled on white chocolate on occasion, but I don’t think I’ve ever cooked with it before. I couldn’t get my imagination in gear for this event, so I searched the Food Network website and found a recipe from Gale Gand for Chocolate Bread Pudding with White Chocolate Sherbet. At first I planned to make only the sherbet, but that wouldn’t have been terribly photogenic, so I racked my brain trying to think of something that would complement the sherbet both in terms of flavor and visually. Nothing seemed quite right. Finally, I acknowledged to myself that what I wanted was REAL chocolate. To be specific, I wanted that chocolate bread pudding that was included in the recipe.

I made a deal with myself – I would make the bread pudding, but I would have to cut the recipe down to a single serving. For most of the ingredients I simply divided the amount called for by 6. For the bread I used 1 ½ slices of Pepperidge Farm white bread – though if I were to do this again I would increase that to 2 slices. I happened to have some leftover heavy cream, which I used, but I substituted skim milk for the half-and-half. I think another time I would use all milk.

For the sherbet I used El Rey Icoa White Chocolate, which is touted as being “Venezuelan single bean origin”. The sherbet couldn’t have been easier – however the melted chocolate seemed to float to the top of the mixture as it chilled in the refrigerator. When I was ready to freeze it, there was a soft skin on top. Fortunately, it dissolved back into the mixture when I stirred it, and when I strained the mixture there were no lumps.

I ate the bread pudding just slightly warm with a scoop of the white chocolate sherbet. It was heaven, but oh so rich. I should have split the bread pudding into two servings, and next time I would, but I couldn’t stop myself. Just in case you haven’t looked at the recipe yet, not only does it have chocolate, cream, and eggs in it, it also has vanilla bean (which I recently realized is just as addictive as chocolate) and dried cherries. Topping it with white chocolate sherbet was overkill, but I’m not complaining. The sherbet was wonderful – the first bite was just like biting into a white chocolate bar, only cold, and wet, and with more of that lovely vanilla bean.

I went to bed with a heavy stomach but a happy heart. When’s the next Sugar High Friday?