Sunday, January 23, 2005

IMBB 11 - Gail's Hummus


The following is my Aunt Gail's contribution to IMBB 11 ...

Hi Cathy---just a quick note to send you my "bean" recipe. This was taught to me by my friend Lorraine whose parents were Lebanese and was my first introduction to Middle Eastern cuisine, which I've come to really enjoy.


Hummus

One can chick peas, drained, save liquid
3 (or more) cloves of garlic
1/2 tsp. salt
1/2 cup tahini (sesame seed butter)
Juice of 1/2 lemon
About 2 Tbsp liquid from peas

Put peas, garlic, salt and liquid from peas in food processor. Process till smooth, adding more liquid to achieve the consistency desired. Add tahini and lemon juice and process until smooth.
I like this used as a dip for baby carrots and celery, or as a spread on pita bread. It's so much better than purchased hummus!

IMBB 11 - Nupur's Pan-fried Sprouted Lentils


The following IMBB 11 entry was emailed to me by Nupur ...

Hi, Being a veggie, I LOVE beans of all types! For this IMBB I made"Pan-fried Sprouted Lentils". It's a tasty and easy recipe, takes about 10-15 minutes to put together. I started by sauteeing onions, ginger and garlic in some oil in a pan. To this I added turmeric, chili powder, cumin and coriander powder and seasoned it with salt. After frying the spices for a minute, I added sprouted lentils (see note), sauteed the lentils in the spices for 2 minutes, then added 1/4 cup of water and covered the pan for 7-8 minutes till the lentils were steamed and tender. Finally I tossed in some lemon juice and minced cilantro. This tastes great with some tomato, cucumber and whipped yogurt as a salad; or wrapped into a pita; though traditionally in India it is eaten with rice and "dal".

A note on sprouting lentils: I am baffled by all the fancy contraptions sold to sprout beans. I make sprouted week every week using two very hi-tech tools: a colander and a clean cotton cloth! I start by soaking a cup of beans or lentils (any kind that is sold whole will do) overnight. Then drain out the water and rinse the soaked beans several times. I place the cloth into the colander and then the beans on the cloth, and fold the edges of the cloth over the beans. I keep the beans moist by running water over the colander twice a day. In 2-3 days, you have sprouted beans! A cup of dry beans makes about 3 cups of sprouted beans.

Saturday, January 22, 2005

Don't Forget!


IMBB 11 is tomorrow! So if you haven't already started on your beany masterpiece, hop to it! Once you've posted, send me an email with a link. Check back here on Monday for the round-up.

Wednesday, January 19, 2005

Dining with the Bloggers - January 19th

Too Many Chefs used to run a weekly feature called Posts of the Week which I really looked forward to. Of course part of the enjoyment was checking to see if my favorites were among their choices (or maybe, just perhaps, one of my own...), but the best part was being introduced to blogs I knew little if anything about. In this ever expanding world of food blogs, you need all the help you can get keeping up!

I thought I’d try my hand at a weekly feature that will highlight recipes that I’ve tried and liked from other blogs. These will not necessarily be posts from the current week – not only because I like to explore the archives of blogs that are new to me, but because I’m often a little pokey in getting around to preparing the recipes I print out. So, without further ado, the first edition of Dining with the Bloggers…

First up is a wonderful Carrot Habanero Soup that Alice of My Adventures in the Breadbox found in the current issue of Cooking Light. I can always count on Alice for great bean recipes, but here’s one with no beans. I’ve been a little timid about cooking with habanero peppers because of their reputation for being so hot. This soup uses a single habanero pepper which is pierced and thrown in whole. It is then removed before serving, giving the soup the perfect amount of heat. It’s also loaded with all sorts of vegetables – carrots, sweet potatoes, leeks, and onions – so you can’t help but feel virtuous when you eat it! Best of all, it really is a great-tasting soup.

People often comment on incidents of synchronicity among food bloggers, where two or more bloggers turn there attention to the same topic at nearly the same time. It happened again when both Linda of At Our Table and Debbie of Words to Eat By posted about a delicious and healthy snack – roasted chickpeas. I happened on Linda’s post first, which included a recipe for Baked Chickpeas with Herbs. I was curious but had some doubts when I first saw the recipe. After I tried them, though, I was hooked. They are nicely crunchy, but you won't break a tooth on them. The seasoning in Linda's recipe is really wonderful - garlic powder, cayenne, oregano and salt. I kept telling a coworker about them and promised repeatedly to bring some in for her to try. I um, never did bring her any… Maybe when I get around to trying Debbie’s recipe for Curry Roasted Chickpeas I’ll bring her some. Maybe.

Monday, January 17, 2005

Mondays with Maida - Chocolate Peanut Cookies


Page 34 in the old book / page 48 in the new book

At long last, the eleventh and final chocolate drop cookie! They are Chocolate Peanut Cookies, and although they weren’t my favorite of the bunch, they were very good and I think they might have been the most popular among my coworkers. The chocolate icing is an obvious selling point and apparently the peanuts gained them high marks as well. They are small thick cookies that are firm to the bite and are very chocolaty.

The dough is the ultimate in simplicity, made of only chocolate, butter, sugar, eggs, flour, and salted peanuts. It mixed up quickly and was easy to handle, although the peanuts did make forming evenly sized and shaped cookies a little trickier. The glaze was supposed to be thin enough to spread on its own into a even layer over the whole cookie. It became obvious after the first couple of cookies that I didn’t have it thin enough to behave as it should, but I didn’t stop to futz with it. It was quite late, and I didn’t mind it going on a little thicker. The glaze continues to thicken as it stands, so I did have to stop to thin it with a little hot water a couple of times just to keep it a workable consistency. Using hot water to thin the glaze was suggested in the recipe and worked well – the only problem was its effects didn’t seem to last very long!


It was late when I finished icing these, so I left them sitting on the rack overnight to set the glaze. This wasn’t much longer than the suggested “several hours”, so I hoped it wouldn’t be too long. They didn’t seem to suffer for it, and as I mentioned above they were well received at work. I thought they were very good (I like an iced chocolate cookie as much as anyone else!), but they didn’t stand out much from some of the other cookies I’ve made over the past few weeks. If you’re a peanut lover though, this may be your cookie!

Next week – Whole-Wheat and Honey Hermits (with spices, currants, raisins, dates, and walnuts…yum, I can’t wait!!)

Nutrition Facts

Friday, January 14, 2005

Welcome to Maryland #3!


Guess what just came in the mail...

Wednesday, January 12, 2005

Food blogging in the news...

I came across this via the hungry tiger - an article in the Boston Globe about food blogging! Lots of familiar names too.

Monday, January 10, 2005

Cathy’s Secrets to Modestly Successful Cake Baking


I have a bad history with layer cakes. I can’t count how many times they’ve fallen or broken up on me. Then, of course, there were the ones that were just plain bad. I’m also not so good at achieving a polished look to my cakes – they look homemade. But I can’t complain about that ... I have bigger problems.

The really bad thing about this weakness of mine is that generally the only time I make a layer cake is for someone’s birthday. And seeing as how I’m always doing things at the last minute, there is seldom time to go out and buy a replacement, let alone bake a replacement.

I have not yet completely conquered my cake-baking ineptitude, but I do seem to have zeroed in on a few rules that have blessedly reduced the number of disasters. I know there are at least five or six more rules I haven’t figured out yet, but the three I have worked out have served me well.

1. Start with a good recipe. How do you know if you have a good recipe? Based on past experience – preferably your own. If you don’t want to make the same cake over and over (like me), then turn to a book or an author that you’ve come to trust. I have a book that has provided several recipes that have been successful, including the recipe for my most recent cake. It is The Wooden Spoon Dessert Book by Marilyn M. Moore. With this last cake, I think this book will now be where I turn first when I’m looking for a cake recipe (although I’m sure there is at least one disaster laying in wait between its covers).

2. Line the bottom of your pans with parchment. There’s just no excuse not to – it takes a few minutes, but it virtually guarantees that your cake layers will come cleanly out of the pans. Trace around the pans onto the parchment with a pencil and cut the pieces out, cutting just within the trace line. Grease the bottom of the pan, fit the piece of parchment into the pan and smooth it out, then grease and flour the parchment and the sides of the pan.

3. After you put your cake in the oven, grab the timer and evacuate the area. I go upstairs, but you could go for a walk or whatever. I used to start right in on the dishes as soon as I put the cake in the oven. I don’t know for a fact that this is what caused my cakes to fall, but it won’t be the thing that causes them to fall anymore.

Happily, the cake I made this weekend for my sister’s birthday didn’t fall or break and was really delicious. It was even reasonably attractive. It was a Toasted-Butter-Pecan Cake from the Wooden Spoon Dessert Book. The kids at the party were afraid of it because of the nuts, but the adults seemed to enjoy it very much. It’s a fairly small cake since it is made in 8-inch pans, but it is very rich and we had more than enough for 10. This was my first time making an 8-inch layer cake. I think I like this size – it looks nice and there are fewer leftovers!


Mondays with Maida - Chocolate Peanut-Butter Ripples


Page 32 in the old book / page 47 in the new book

I’m sort of copping out this week – these are cookies that I made and posted about a few months ago. I didn’t bake them again. Instead, I took the opportunity to work ahead a little and made next week’s cookies. So here is a little recap of the cookies that got me going on this project in the first place.

This week’s cookies are Chocolate and Peanut-Butter Ripples. They are thin, crisp cookies with a layer of peanut butter dough nestled between two chocolate layers. The cookies in the drawing that accompanies the recipe in the old book appear to have concentric circles of contrasting doughs: the bottom chocolate layer is the largest and is topped with a smaller layer of peanut butter which in turn is topped with another, smaller layer of chocolate.

The chocolate and peanut butter doughs are very simple and mix up quickly. The recipe calls for smooth peanut butter, but the only peanut butter I had on hand was the kind they grind in the grocery store, so I used that. I added a pinch of salt since there was none in the peanut butter. I was concerned that the consistency might cause some problems, but it seemed to work just fine. The flavor was great and the texture of the peanut butter layer was almost like the peanut butter in a Reese’s cup.


Assembling the cookies takes a little time, but is not difficult. You drop a small mound of chocolate dough, then top it with a small mound of the peanut butter dough, and cap that with another little mound of chocolate. The peanut butter dough was a little crumbly, so I shaped it with my fingers rather than dropping it from a teaspoon. The recipe suggests using a fork dipped in sugar to flatten the cookie, but I quickly abandoned that approach in favor of using a small plastic spatula. The chocolate dough was very soft and the fork, even though it was sugared, kept pulling off parts of the top layer that pushed up through the tines. You could also use a small glass – but a flat surface is definitely preferable to a fork. I would make one change next time – the recipe instructs you to divide the chocolate dough in half and use equal amounts in the bottom and top layers. I followed those directions this time and as you can see in the picture above, my cookies didn’t “ripple”. To achieve the concentric circles shown in the illustration, I think you would need to use more chocolate dough in the bottom layer and only a small amount in the top layer. It would also be interesting to see what would happen if you didn’t bother to flatten the cookies before baking them. I’ll bet they would spread just the same.


The cookies were delicious and despite the fact that the peanut butter appears to have all but disappeared from the outside, when you bite into one of the cookies there is a distinct layer of peanut butter. When I made these back in September, I gave them to my new next-door neighbors as a welcome gift. Good thing I got them out of the house – I think they could have been habit-forming!

Next week – The last chocolate drop cookie – Chocolate Peanut Cookies (hey Santos – they’re iced!)

Nutrition Facts

Friday, January 07, 2005

SHF 4 – Pistachio Gelato


Pistachios are fairly new to me. My first pistachio purchase was a mere two months ago when I bought a one pound bag of shelled pistachios in order to make Holiday Biscotti for IMBB 10. While I enjoyed the biscotti, I was frustrated that I couldn’t discern a distinctive pistachio flavor.

I mentioned to a friend that I was at a loss to describe or even recognize what pistachios taste like and asked her how she would describe the taste. She said when she thought of pistachios she thought of pistachio ice cream (which she thought had sort of a minty flavor), but she had her doubts as to whether that was truly pistachio. This conversation took place just days before I began looking for something to make for Sugar High Friday #4.

Sugar High Friday is the creation of Jennifer at The Domestic Goddess. It is a blogging event in which participants prepare something sweet which incorporates the theme ingredient and share the results by posting to their blog on the designated day. This time around it is hosted by Viv of Seattle Bon Vivant and the theme is nuts.

It didn’t occur to me at first to make something with pistachios. Since I am hosting a birthday party tomorrow, I spent quite a bit of time hunting for a cake recipe that featured nuts, would be suitable as a birthday cake, and would appeal to both adults and small children, but I came up empty. (Actually – I later found a recipe in The Wooden Spoon Dessert Book for a Toasted-Butter-Pecan Cake that sounds awesome. I'll be making it tonight and serving it tomorrow - so I'll have to tell you about that another time.)

After I widened my search to include anything made with nuts, I came upon a recipe for Pistachio Gelato at Leite’s Culinaria. Perfect! It appealed to me because it would be simple to make, I had pistachios to use up, and best of all – I might finally figure out what pistachios taste like.


The gelato base consists of whole milk and sugar. These are heated together and then ground pistachios are added and the mixture is allowed to steep overnight in the refrigerator. Just before freezing the gelato, you strain out the ground pistachios (though some fine bits find their way in, giving the finished gelato a nice texture). After fifteen to twenty minutes in the ice cream maker and an hour in the freezer to firm it up, you’ve got yourself some mighty fine gelato!

I suppose you might be wondering – does she know what pistachios taste like yet? Well, I’m not sure I can put it into words, but I think yes. I think the next time I taste it I’ll know it, and I’ll be thinking … mmmmm, pistachio!

Tuesday, January 04, 2005

1000 Recipes


If you haven't already, take a look at Santos' proposal for travelling journals called 1000 Recipes. She has 3 journals ready to head out into the world, and I assume based on the project title that she is prepared to send out a few more as soon as there are enough takers. The idea is that when the journal comes to you, you enter one or more of your own recipes (with whatever artistic embellishments you're inclined to make) and then send it off to the next person in line. Ultimately, Santos intends to auction the journals and donate the proceeds to charity. Sounds like another fun way to connect with food lovers all over the world!

Monday, January 03, 2005

Mondays with Maida - Chocolate Banana Cookies


Page 31 in the old book / page 42 in the new book

We’re coming down the home stretch with these chocolate drop cookies…I promise! This week it's Chocolate Banana cookies. These are to me an old-fashioned drop cookie. I’m not sure why I think that – perhaps because they remind me of a cookie my Mom used to make. It may also be because they are rather plain in appearance, but very tasty. They have a good amount of banana in them and would be a nice alternative to banana bread when you’re looking for a way to use up those aging bananas.

There are no unusual ingredients in these cookies – in fact, I had everything I needed on hand for a change. Melted chocolate chips provide the chocolate flavoring for these cookies and lots of walnuts provide added interest. These go together easily and I had no goof-ups this time. I did a couple of double-takes as I was following the recipe, though. The order that the ingredients are added is a bit different and I was a little paranoid after last week’s episode with seizing chocolate. The recipe is supposed to make 55 cookies, but I ended up with 45 cookies. Maida Heatter says to “Use a heaping teaspoonful (make these rather large) of the dough”, but not as large as I did, apparently. (Note: the nutrition data is based on 55 cookies.)


Easy peasy, no troubles, and in the end delicious cookies – can’t beat that! The dominant flavor in these cookies is the banana. I was wondering as I ate one if I would even be able to detect the chocolate in them if I didn’t know that it was in there (and had my eyes closed!). I think the chocolate provides a richness that would be missed even if it doesn't provide a distinctive taste of chocolate. In any case, they are very good. I ate one while still slightly warm and it had a delicate crunch on the outside and was soft on the inside. Then there’s the crunch of the walnuts and that wonderful banana flavor. Yum!

Next week will be a rerun of sorts – I will revisit the Chocolate and Peanut-Butter Ripples that I made a couple months ago before starting this project. Actually, it was making those cookies that inspired me to start Mondays with Maida. I realized after making them how few recipes I had tried in the book and how much I like those I had tried. I guess I just needed an excuse to make more cookies!

Nutrition Facts

Saturday, January 01, 2005

Is My Blog Burning 11 – Beans, beans, the musical fruit…


I have been stumped for weeks trying to think of a different tag line for IMBB 11, but that little chant from childhood just wouldn’t go away. So be it. This is the eleventh edition of Alberto’s creation, Is My Blog Burning, in which bloggers the world over come together to celebrate a food, a dish, or a cooking method and share the results. This time the theme is beans and the date is January 23rd, 2005.

What kind of beans? Anything your heart desires. I will only go so far as to define a bean as a legume (so jelly beans and coffee beans are out). The beans can be dried, fresh, canned, in the pod or not, or they could even be sprouted. They can be kidney beans, black-eyed peas, black beans, chickpeas, brown lentils, red lentils, chana dal, green beans, fava beans, navy beans, pinto beans, you name it. Prepare your creation on or before the 23rd, and then tell us all about it in a post to your blog on the 23rd. Once you’ve posted send me an email with the link to your entry. If you don’t have a blog and you’d like to participate, by all means do! Just email your entry to me and I will post it on my blog. Either way, it will be helpful to those of us tasting your entry virtually, if you include photos and a recipe (or a link to a recipe) if possible. On or about the 24th I will post a wrap-up so we can all find our way to every single beanie post.

As you may know, in some cultures beans are served on New Year’s Day and thought to bring luck or prosperity. For example, black-eyed peas are served in a dish called Hoppin’ John in the southern U.S. states and are thought to bring good luck in the new year. You may be eating your beans a little late, but here’s hoping they bring you a new year of peace, health and prosperity. Happy New Year to all!

Wednesday, December 29, 2004

Mondays with Maida - Chocolate Raisin Cookies


Page 30 in the old book / page 46 in the new book

Baking cookies is not the first thing that comes to mind when deciding how to spend the day after Christmas. And in fact, I had trouble mustering up some enthusiasm for the project. Fortunately, this week’s recipe, Chocolate Raisin Cookies, is not difficult and didn’t require too much effort. Unfortunately, I had some trouble with these cookies – I made a minor substitution which might have affected the outcome, I made a mistake in mixing the dough, and I had trouble getting the timing right.

This recipe calls for sour cream in addition to quite a bit of butter. Since I had some leftover lowfat sour cream, I decided to use it rather than purchase more. I also goofed when mixing the dough. I should have added the melted chocolate to the butter/sugar/egg mixture before the sour cream. Instead, I accidentally added the sour cream first. I realized my mistake before I mixed in the sour cream, but thought the order couldn’t be that important. Wrong. When I added the chocolate, it seized. The dough appeared to have grated chocolate in it rather than melted chocolate. Lesson learned – next time I would scoop out the sour cream rather than mixing it in.


I had trouble again with timing. The recipe says the cookies should bake for 18 to 20 minutes but cautions that they shouldn’t be overbaked since the centers are supposed to be soft and chewy. I baked the first batch for 18 minutes. The cookies were very dark around the edges and appeared overdone. I kept reducing the time (the last batch was 13 minutes), but I don’t think any of the cookies remained chewy in the middle after cooling. These cookies are described as “both soft-chewy and crispy-crunchy”, which sounded really good to me. I didn’t achieve that result and was rather disappointed in the cookies. I can’t help but wonder, though, if I hadn’t made the substitution and hadn’t made that mistake, how they would have turned out.

Next time – Chocolate Banana Cookies.

Nutrition Facts

Thursday, December 23, 2004

Happy Holidays!


After all the hustle and bustle of holiday preparations, may you now find some quiet moments to enjoy the company of family and friends. Best wishes to all of you for a joyful holiday season!

Monday, December 20, 2004

Mondays with Maida - Coconut Grove Cookies


Page 28 in the old book / page 44 in the new book

Another chocolate drop cookie this week, but this one is very interesting. The base is chocolate with chunks of chocolate – quite similar to a couple of the cookies from past weeks – but they are topped with a chewy coconut and meringue mixture. Think Mounds bar inside out. They are not the most attractive cookies and those coconut topknots have minds of their own (about half wound up on the side after the cookies baked), but with nuggets of bittersweet chocolate within and that chewy coconut on top they taste great. The recipes in the old and new books are the same, though the new book calls for semisweet chocolate and lacks a note which is found in the old book. The old book lists sweet, bittersweet and semisweet chocolate as options and specifically mentions Lindt Excellence, Tobler Tradition, Lindt or Tobler extra-bittersweet, and Baker’s German Sweet as good choices. Since I needed 8 ounces of chocolate for this recipe, I decided to use Callebaut bittersweet which is sold by the pound in Whole Foods.

Except for the aforementioned problem with the coconut topping sliding off in baking, I had no trouble mixing or baking these cookies. I got lucky and managed to portion out the chocolate base and coconut topping so that I didn’t wind up running short on either one.


I liked these – they were fun to make and tasted very good. I am so ready to try some of the non-chocolate cookie recipes though! Speaking of which, Viv at Seattle Bon Vivant recently posted about an article on cookie baking that appeared in the Seattle Times. The article includes a recipe from Maida Heatter for Sour-Cream Ginger Cookies. If I keep on schedule, I’ll be posting about those cookies on February 14th. If they sound good to you, you may want to grab the recipe while you can.

Next time – Chocolate Raisin Cookies.

Nutrition Facts

Sunday, December 19, 2004

Cookie Weekend 2004


Every year I take a couple of days off and have myself a very long weekend of Christmas cookie baking. Inevitably other things come up, so it’s not like I’m baking cookies day and night, but it is definitely the focus of those three or four days. I usually bake six kinds of cookies. This year I baked seven – six plus my “Mondays with Maida” cookies. The other thing that was different (and fun) this year was that three of the recipes I tried came from other food bloggers.

Here’s what I made:

Chocolate pecan bars – I make these every year and they are always everyone’s favorite. They’re from a 1989 Karo corn syrup magazine ad and taste like a chocolate pecan pie.

Sugar cookies – page 193 in Maida Heatter’s Book of Great Cookies. I make these every year as well. This is a wonderful recipe – the cookies have great flavor and the dough handles beautifully.


Cardamom butter squares – page 120 in the December, 2004 Gourmet. (Gourmet's recipe was based on this recipe from McCormick. The recipe in Gourmet uses a little more cardamom and adds the icings.) These are tasty little cookies drizzled with chocolate and an espresso icing. They are easy, beautiful, and delicious!

Soetkoekies (spice wine cookies) – from Jeanne at Cook Sister!. This is a South African cookie loaded with spices, almonds and red wine too. You don’t even need a mixer for these and they taste great!

Chez Panisse Gingersnaps – from Renee at feeding dexygus seconds. Such a great story – I had to make them. I had a little trouble slicing them neatly, but they are still delicious.


Marzipan pine nut cookies – page 44 in the Spring 2004 Eating Well. Sam at Becks & Posh made these for IMBB10 and fortunately I just happened to have this issue of Eating Well. I’ve only eaten one of these (so far) – but I think this is my favorite new cookie this year. I plan to make a second batch so I can enjoy a few more!

Coconut Grove Cookies – page 28 in Maida Heatter’s Book of Great Cookies. More about these tomorrow!

Monday, December 13, 2004

Mondays with Maida - Chocolate Applesaucers


Page 26 in the old book / page 43 in the new book

I know what you’re saying, “OK, now this is starting to get a little old…” I promise, this is the last iced chocolate drop cookie for a little while. There’s one more, but it’s a few weeks off. Actually, it is rather interesting to make and compare a number of similar cookies. Since the changes from week to week are slight, I can start to get a feel for the effect that each small change has on the final product. Anyway, the cookies this week are called Chocolate Applesaucers and, as you might have guessed, they are made with applesauce. They also have walnuts, raisins and spices. Both the cookies and the icing are made with cocoa. The old book doesn’t specify which type of cocoa to use, but the new book calls for Dutch process cocoa, so that’s what I used.

These cookies are mixed in the mixer and go together quite easily. They are very large. The recipe instructs you to use a ¼ cup measuring cup to measure out the dough for each cookie and to only put 5 cookies on each sheet. The recipe is supposed to make 22 cookies, but I ended up with just 20. To get 22, you should probably use a scant ¼ cup for each. Because the cookies are so large, the recipe recommends that you prop up your cooling racks on something to increase the air circulation under the racks, hence my floating cookie racks…


The icing is very easy, but I found it thickened up pretty quickly – probably because the house is so cool. After I had iced half the cookies I added a little more water and the icing returned to a workable consistency. After a few more, I found it necessary to do this again but it was less effective. It probably would have helped if I had reheated the water (boiling water is called for in the recipe).

I was good all day in anticipation of eating one of these cookies. I was out Christmas shopping all afternoon (I’m done – yeah!!) and didn’t get started on them until after dinner. I ate my “sample” almost immediately after it was iced – I couldn’t hold out any longer! It had a nice crisp edge with a moist but not chewy interior, and of course all those walnuts and raisins. Both the cookie and icing have a rich, dark chocolate flavor. Very, very good – a solid B+.

Next time – Coconut Grove Cookies.

Nutrition Facts

Friday, December 10, 2004

SHF3 – Auntie Bee’s Cardamom Apricot Muffins


Sugar High Friday has rolled around again. Hosted by Zarah Maria of Food & Thoughts, the theme is “Spice Up Your Winter!” Participants were asked to include cardamom, nutmeg and/or allspice in their sweet creations.

I didn’t have to think about this very long before deciding that I would focus on cardamom. My great aunt, Auntie Bee, who passed away many years ago but still is very fondly remembered by my entire family, once told me that cardamom was her favorite spice. I don’t remember that she told me why, but I believe that she had a fascination with all things Swedish (probably because Uncle Ted’s family was Swedish) . This fascination apparently included Swedish cooking, because one of the cookbooks I inherited from her is titled “Good Food from Sweden”. Cardamom is commonly used in Scandanavian baked goods.

I looked through Auntie Bee's Swedish cookbook for recipes using cardamom. I found a couple that were possibilities, but the instructions all started with “Wash and dry butter.” I had no idea what that meant, although I’ve since found some instructions on-line for washing butter , and I suspect it is not necessary with the butter we purchase today.


Having ruled out the recipes from the Swedish cookbook, I was briefly at a loss as to where to turn next but then remembered that I have Auntie Bee’s recipe boxes! I looked through her recipes for cookies, cakes and breads and came up with several recipes using cardamom. There were recipes for a Coffee Braid, Holiday Cardamom Bread, Margo’s Danish Pastry, and Cardamom Fruit Muffins. I’d eventually like to try the other recipes, but for this occasion I went with the easy one – Cardamom Fruit Muffins. It is actually a variation of a recipe called “Rich & Sweet Muffins” that calls for the addition of ground cardamom and candied fruit. I swapped dried apricots for the candied fruit, cut the recipe in half, and added a cinnamon icing (an idea I got from the coffee braid recipe). The muffins were really wonderful. I don’t think I’ve ever made muffins with butter before. My usual recipe for blueberry muffins calls for melted butter, but I’ve always substituted vegetable oil. What a difference the butter makes! The crust is tender and crunchy-crumbly and the muffins live up to their name – they are rich and sweet!

Auntie Bee’s Cardamom Apricot Muffins

makes 6 – can be doubled

1 cup flour
1 tsp baking powder
¼ tsp salt
1/8 tsp ground cardamom
¼ cup softened butter
¼ cup sugar
1 egg
¼ cup milk
¼ cup chopped, dried apricots

Preheat oven to 375 F. Butter a 6 cup muffin tin. Sift together flour, baking powder, salt, and cardamom and set aside. Cream the butter with the sugar and then beat in the egg. On low speed add half the flour mixture, then the milk, and then the rest of the flour mixture. Add the apricots. Spoon batter into muffin tin and bake for 20 to 25 minutes. Allow to cool a little, then drizzle with cinnamon icing (strained confectioner’s sugar and a bit of cinnamon mixed with a little milk or cream). I used a sandwich bag with a corner clipped off to drizzle the icing.


Monday, December 06, 2004

Mondays with Maida - Key West Chocolate Treasures


Page 24 in the old book / page 41 in the new book

No need to adjust your set. Yes, these cookies do look very much like last week’s cookies. In fact, if you compare the list of ingredients they are very similar. Both recipes have the same amounts of flour, butter, dark brown sugar, egg and vanilla. However, this week’s cookies - Key West Chocolate Treasures – have more chocolate, sour cream rather than milk, coffee and coconut. The icing is slightly different as well, using sour cream rather than heavy cream. They are smaller than last week’s cookies and, to my taste, have a little more character.


These cookies are mixed in a mixer and are a little more bother than last week’s cookies – but not much. The only difficulty I had was in melting the chocolate for both the dough and the icing. I’ve heard of chocolate “seizing”, but I’m not sure I’ve ever experienced it before. I think I have now. The chocolate for the dough is melted together with ½ cup of coffee. The chocolate was nearly melted and all was well, when suddenly it started separating and looking a little clumpy. I wasn’t too concerned since this was going into the dough, and indeed it turned out fine. Once mixed into the butter, sugar and eggs, the chocolate was perfectly smooth. I was slightly more concerned about the chocolate for the icing, since the problem appeared to have been caused by a mistake I had made. I melted the chocolate and butter together, but should have included the sour cream as well. When I realized my mistake, I rather hastily threw in the sour cream. I put it back on the heat and stirred, but before long it was looking pretty awful. Some sort of liquid was separating out from the chocolate and the chocolate was very clumpy. I tried using a whisk and kept it on the heat, but nothing was helping. Miraculously, as soon as I stirred in some of the sugar, the chocolate became silken smooth.


These cookies are quite good. They are not as cakey as the Big Old-Fashioned Chocolate Cookies from last week, and are slightly chewy from the added coconut. The icing is delicious – I had a little leftover and kept going back and licking a little more off the spatula. Of the four cookies I’ve made so far, this is #2. My favorite so far is the first recipe I made – Chocolate Chocolate-Chip Cookies.

Next time – Chocolate Applesaucers.

Nutrition Facts

Sunday, December 05, 2004

Delicata Squash Soup with Arugula Pesto


When I started thinking about what to have for dinner last night I was thinking light and simple. It being December and pretty chilly outside, soup naturally came to mind. I had a Delicata squash in the fridge that had been there for a couple of weeks, so I decided to make use of it. I wanted to include some greens in the soup and thought that the slight bitterness of arugula might contrast nicely with the sweetness of the squash. It was then that my train of thought veered off track – what was to have been a simple supper became considerably more complicated.

Somewhere in one or more of the many food magazines I have browsed over the years, I know I’ve seen pesto used as a garnish for soup, though I had never tried it myself. The idea of an arugula pesto on top of squash soup sounded really good to me. Then I got a really crazy idea – instead of using Parmesan cheese in the pesto, what if I used aged Gouda? And… instead of using pine nuts, why not use pecans? I think the only reasons I thought of using the aged Gouda were that I happened to have some on hand and I really like it. I didn’t have a clue as to whether it would “go with” arugula. In fact I started worrying about the combination enough that I decided to validate it by doing a search in Google. My search turned up several salads that included arugula, aged Gouda and pecans, so I decided it must be an acceptable combination.

I envy people that can confidently work out a recipe in their head. I suppose much of that ability must come from experience eating and preparing many different foods, but to me it’s like being able to read a sheet of music and hear the music in your head – another skill that eludes me. Anyway, I have to rely on luck as much as anything. Occasionally it works.


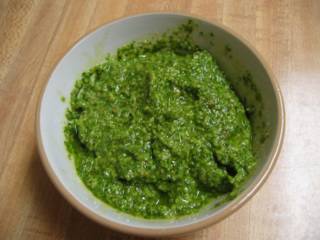
The pesto worked. However, my angst over the choice of nuts and cheese was unnecessary. The arugula overpowers them. I think pine nuts and Parmesan would work equally well and would taste just about the same.

I was much more laid back about the soup (probably because this was more familiar territory). I roasted the Delicata squash to accentuate its sweetness, added a sautéed onion and some roasted garlic, pureed them together in the food processor and then added chicken stock.

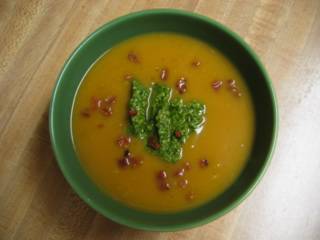
I topped the soup with salty crisped bits of pancetta. The mix of contrasting flavors and textures was delicious. I had a heap of dishes to do, but it was worth it! Tonight I had the leftover pesto in a pasta dish, but it’s late and that will have to be another post…

Delicata Squash Soup with Arugula Pesto

Pesto:
3 cloves garlic
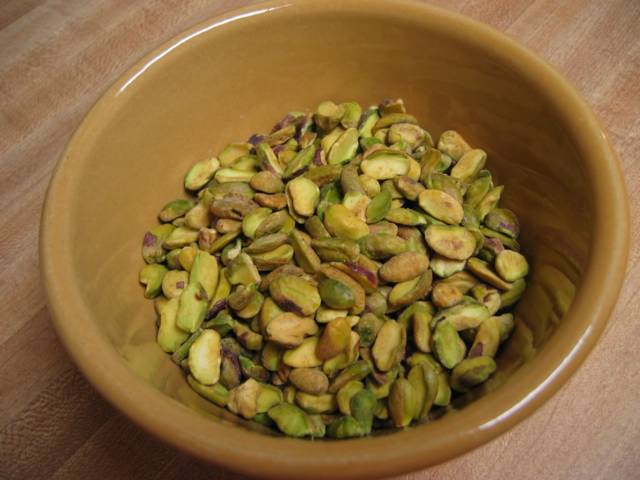
1/3 cup pecans, toasted and cooled
About half a bunch of arugula (I weighed mine after it was cleaned and I had 90 grams or about 3 packed cups)
1/3 cup olive oil
½ tsp salt
1/3 cup grated aged Gouda (mine weighed 15 grams or about ½ ounce)

Soup:
2 Delicata squash (a little under 3 pounds total)
1 onion
1 head roasted garlic
3 to 4 cups chicken stock
¼ tsp salt
1 thick slice pancetta or bacon

Make the pesto: Place the garlic cloves in the food processor and pulse a few times. Add the pecans and process until finely chopped. Add the arugula, olive oil, and salt, and process until smooth. Place the pesto in a small bowl and then stir in the cheese. (Note: I went heavy on the arugula and light on the oil and cheese, but you could easily change the amounts to suit your preferences.)

Make the soup: Cut each squash in half and scoop out the seeds. Rub a little olive oil over the cut side of each half and sprinkle with salt and pepper. Place cut side down in a baking dish (I had to use 2 to fit all four pieces) and bake at 350 for about 45 minutes or until tender. Meanwhile, cut the pancetta into fine dice and cook in a non-stick frying pan over medium high heat until crisp. Remove the bits from the pan and place on paper towel to drain. Pour off the accumulated fat. Dice an onion and sauté it in the same pan. Place the onions and roasted garlic in the food processor. When the squash is done, scoop the flesh from each shell and place in food processor. Process until smooth. Pour the pureed vegetables into a 3-quart pot and add the chicken stock and salt. Cook just until heated through. Ladle the soup into bowls and top each bowl with a generous tablespoonful of pesto and a sprinkle of pancetta bits.

Monday, November 29, 2004

Mondays with Maida - Big Old-Fashioned Chocolate Cookies


Page 22 in the old book / page 40 in the new book

First, a couple of administrative details… I’ve decided to add the nutrient facts to each post. I’m not sure this will be welcomed, so I’ve set it up so that you don’t have to look at it. There’s a link at the end of the post that will take you to another page where you can find out the number of calories, grams of fat, etc. I’ve calculated these using Living Cookbook (which, by the way, is a great program if you’re in the market for cookbook software). The program actually calculates the amounts of many other nutrients, so if there's something missing that you'd like me to include, let me know. I’ve also created an archive of all the Mondays with Maida posts and have put links to both the archive and the nutrient facts on the sidebar.

Now on to the important stuff! The next recipe in the “Drop Cookies” section of the book is for Big Old-Fashioned Chocolate Cookies. These are big, cakey cookies that are covered with a rich chocolate glaze. There is nary a hint of crunch in them, not even at the edges. They’re the sort of cookie I imagine would go over big with kids. They’re big, beautiful cookies and it took all my willpower to refrain from eating one until after dinner.


This is another easy cookie that doesn’t even require a mixer. The dough is mixed in a saucepan, and since the recipe makes only 18 cookies (I actually ended up with a few more), forming and baking the cookies is quick work. I had no trouble with these and found that the actual baking time fell within the recommended range. Unsweetened chocolate is used in both the cookie and the glaze.


These cookies are good, though I prefer something with a little more textural interest. I have to say, though, that the glaze makes them quite enticing. There’s a good amount of dark brown sugar in them, but I didn’t notice it as I did in the Chocolate Chocolate-Chip Cookies. That may be because I was distracted by the glaze and the cakey texture and wasn’t paying attention to such subtleties. I wish I could have another so that I could more accurately report on these things, but if you check out the nutrition facts you’ll see why I can’t.

Next time – Key West Chocolate Treasures.

Nutrition Facts

Wednesday, November 24, 2004

Happy Thanksgiving!


Tomorrow is Thanksgiving here in the States and I am thankful for many things, most of all my family and friends. This year I am also thankful for the friendship and sense of community that I have found among my fellow food bloggers. Checking my email for your thoughtful and supportive comments and visiting your blogs has become a part of my daily ritual and a source of great pleasure. So thank you all!

My family is going out to dinner tomorrow. It’s not something we normally do, though we have on occasion. Normally I’d rather eat our traditional meal of turkey, stuffing (either bread or pork and potato), butternut squash, mashed potatoes, baked sweet potatoes, cranberry sauce, rutabaga, celery sticks, pickles, pumpkin pie and mince meat pie at one of our homes. This year I’m welcoming the chance to relax a little bit and enjoy a meal at a restaurant that as kids we thought was THE place to go. They’ve got the best popovers! Actually, we’ll be celebrating my sister-in-law’s birthday at my house tomorrow evening, so I’m still having to prepare a little for tomorrow. I’m keeping it simple since we’ll have eaten our big meal earlier in the day – I’m going to serve chicken soup and pecan pie (with candles in it!).

Here’s my mom’s recipe for pecan pie. Like the restaurant we’re going to tomorrow, this pie is something we thought was pretty special as kids – my mom didn’t make it very often, so when she did it was a real treat. It’s not nearly as sweet as other pecan pies I’ve had, but I’ve always preferred it to those others. Happy Thanksgiving everyone!

Pecan Pie

¼ cup butter
½ cup sugar
1 cup dark brown corn syrup
3 eggs, slightly beaten
1 tsp vanilla
¼ tsp salt
1 cup pecans, broken

Cream butter. Add sugar and cream well together. Add corn syrup, eggs, vanilla, salt, and pecans. Pour into pastry-lined pie plate. Bake at 425 F for 10 minutes, then reduce heat to 350 F and bake for an additional 40 minutes. (You should probably shield the edge of the pastry with foil partway through cooking – I neglected to do that this time and you can see that the crust is quite dark.) Makes one eight-inch pie.

Monday, November 22, 2004

Monday with Maida - "Chocolate Street" Cookies


Page 21 in the old book / page 39 in the new book

Next up in the “Drop Cookies” section of the book is “Chocolate Street” Cookies. The quote marks are Maida Heatter’s, not mine. I find them rather curious (the quote marks, not the cookies), since this is the only cookie in the book that has them and they are not explained in any way. These cookies, which a note in the book says are sometimes called Brownie Drops, are smallish cookies, not too thick, and are crunchy in a fragile, crumbly way (as compared to the firm, candy-like crunch of the last two cookies) with a chewy center. The recipe in the old book calls for German’s sweet chocolate, but suggests a variation where the sweet chocolate is replaced with semi-sweet chocolate and the granulated sugar is replaced with dark brown sugar. The new book calls for semi-sweet chocolate and granulated sugar and does not mention any variations. I decided to go with the original recipe, tempted though I was to use the dark brown sugar.


The dough mixes up quite easily. The chocolate and a small amount of butter are melted in a double boiler and then combined with the other ingredients in a mixer. The ingredients are reminiscent of a brownie recipe – lots of chocolate, sugar and eggs and very little flour. There is also a little cinnamon in these, but I could not detect it in the finished cookie. With the exception of the German chocolate and possibly the walnuts, the ingredients are ones that I would generally have on hand.


These cookies are very good, but I think they might be better if they were a bit larger. I’d prefer more of a chewy center, though I might also have achieved this by reducing the baking time slightly. I think another time I would definitely give the semi-sweet chocolate and dark brown sugar variation a try.

Next time – Big Old-Fashioned Chocolate Cookies.

Nutrition Facts

Sunday, November 21, 2004

IMBB10 – Holiday Biscotti


This tenth go-round of the now famous Is My Blog Burning is hosted by Jennifer, aka The Domestic Goddess, and has as its theme “Cookie Swap”. Because of time constraints, I did not attempt to come up with a creation of my own, but instead turned to Epicurious for inspiration. When I came upon the Holiday Biscotti with Cranberries and Pistachios, I knew I’d found my cookie. They looked festive with red cranberries and green pistachios, sounded easy, and featured an ingredient that was new to me – pistachios.


I found shelled pistachios at Trader Joe’s, which made assembling the dough for these cookies extremely easy. The recipe indicates that the finished dough is sticky, but I found it was not difficult to handle. Forming the logs took just a minute or two and wasn’t messy at all. While baking, they smelled amazing – mostly from the butter and lemon, I think. There were a number of comments on the recipe at Epicurious that said a longer baking time was needed, so I upped the time to 33 minutes. After cooling I used a bread knife to slice the logs. There was some crumbling, but it wasn’t bad.


After a second bake and cooling, the cookies are finished with a dunk in some melted white chocolate and then briefly cooled in the refrigerator. I nibbled on the ends as I sliced the logs and ate one finished cookie. The cookies are delicious – the anise and lemon combination is wonderful and the white chocolate is the perfect final touch. I didn’t pick out a noticeable pistachio flavor, though. Maybe I need to eat another one…


Monday, November 15, 2004

Mondays with Maida – Santa Fe Chocolate Wafers


Page 20 in the old book / page 38 in the new book

Continuing on in the “Drop Cookies” section of the book, this week brings me to Santa Fe Chocolate Wafers. I should forewarn you that the book starts with about a dozen different chocolate drop cookies, so we’re going to be doing chocolate for the next couple of months! The Santa Fe Chocolate wafers are very thin, brittle chocolate cookies. The recipes in the old and new books are basically the same. The only minor difference is that the new book calls for semi-sweet chocolate cut into small pieces, while the old book calls for semi-sweet chocolate morsels.


The dough is mixed in a sauce pan, does not require a mixer, and is quick and easy to put together. While it is still warm, the dough is thin and more like a batter. It gets a little stiffer as it cools. There are no unusual ingredients and the only thing I didn’t have on hand was a jumbo egg. An extra large egg could also have been used, but all I had were large.


The note that accompanies this recipe characterizes these cookies as fragile, but they seem quite sturdy considering how thin they are. If properly packaged, they might even be suitable for mailing. I brought some to a family gathering last night and my mom thought they might make good ice cream sandwiches. I’m afraid they might be too crisp for that, but she brought some home and planned to give it a try. They taste very good, but are quite plain and not very exciting. They would certainly make a nice accompaniment to ice cream, though, as I think they are better suited to the role of a sidekick rather than star of the show.

Next time – “Chocolate Street” Cookies.

Nutrition Facts